

 Completed
zhengbingquant_Nano_V1
PROzhengbingquant_Nano_V1
License
:CERN Open Hardware License
Description
Verified and no issues found, ready for PCB fabrication.
zhengbingquant_Nano_V1
YouTube link: https://youtu.be/o9jtSHh7a54?si=MYGmc70yYvMOVar3
哔哩哔哩链接: https://www.bilibili.com/video/BV1T5aczyE8L/?vd_source=7e806c69a8d91200bb913d5da4bf505b
Project team member: zhengbingquant
Category: Microcontroller Board / Arduino-Compatible
Overview
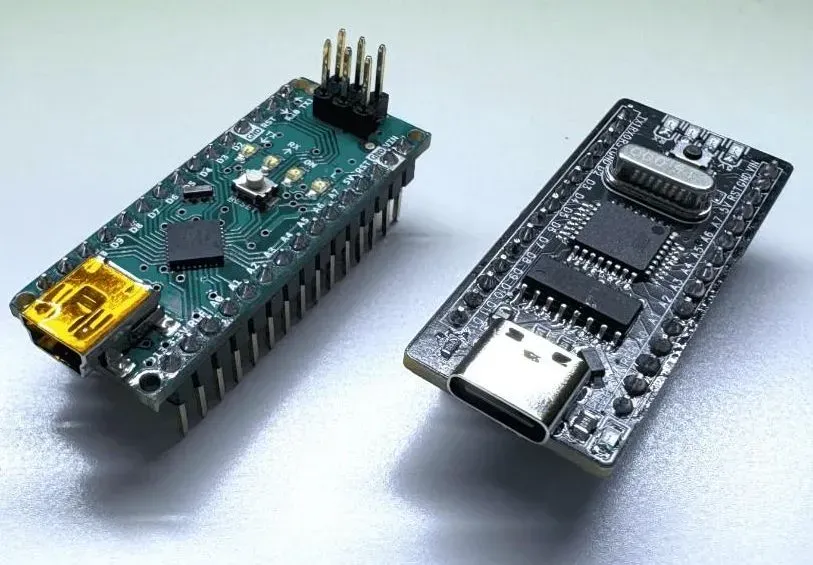
The zhengbingquant_Nano_V1 is a DIY Arduino Nano clone, redesigned with a USB-C connector for modern compatibility. Built around the ATmega328P and CH340C USB-to-Serial, it is fully Arduino Nano compatible and perfect for beginners learning PCB design and microcontrollers.
The board includes 5V & 3.3V regulators, a VIN input (7–12V), and a built-in LED on pin 13. Most components are 0806 SMD, making soldering accessible for beginners. Standard male pin headers ensure compatibility with Arduino shields and breadboards.
This is my first self-designed PCB project as a high school student, made to explore electronics and PCB design. I hope to apply these skills later in my mechanical engineering studies.
Features
-
-
Microcontroller: ATmega328P
-
8-bit AVR RISC architecture
-
Clock Speed: 16 MHz
-
Flash Memory: 32 KB (2 KB used by bootloader)
-
SRAM: 2 KB
-
EEPROM: 1 KB
-
23 I/O pins (14 digital, 6 analog, PWM support)
-
-
USB-to-Serial: CH340C (USB-C connector)
-
Voltage Regulators: 5V & 3.3V onboard
-
Power Input: VIN 7–12V recommended
-
Pin Headers: Standard Arduino Nano male pin headers (breadboard-friendly)
-
Built-in LED: Pin 13
-
Package Sizes: Mostly 0806 SMD → easier soldering for beginners
-
Form Factor: Compatible with Arduino Nano shields & accessories
-
Getting Started with zhengbingquant_Nano_V1
Step 1: Solder Your Board
Tips for beginners:
-
Start with SMD components (resistors, capacitors, ICs) — they are mostly 0806 for easy handling.
-
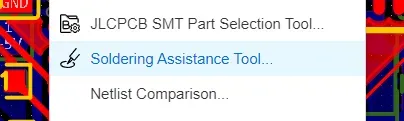
Use the SMD soldering assistant tool in EasyEDA Pro to help place and align components accurately.
-
Apply solder paste or thin solder wire carefully.
-
After SMDs are done, solder through-hole components like male pin headers.
-
Make sure polarized components (LEDs, diodes, ICs) are oriented correctly.
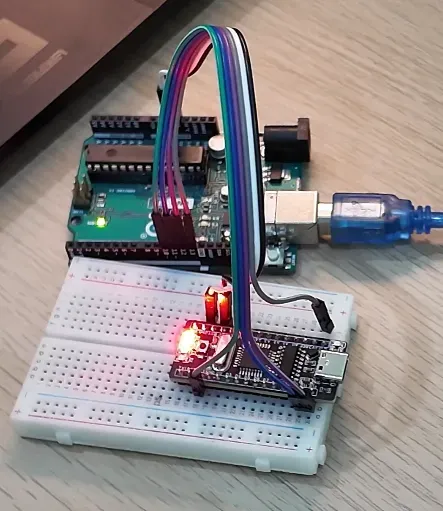
Step 2: Burn the Bootloader
Why: The board is new and cannot run Arduino sketches until the bootloader is installed.
Requirements: Arduino UNO, USB cable, Arduino IDE
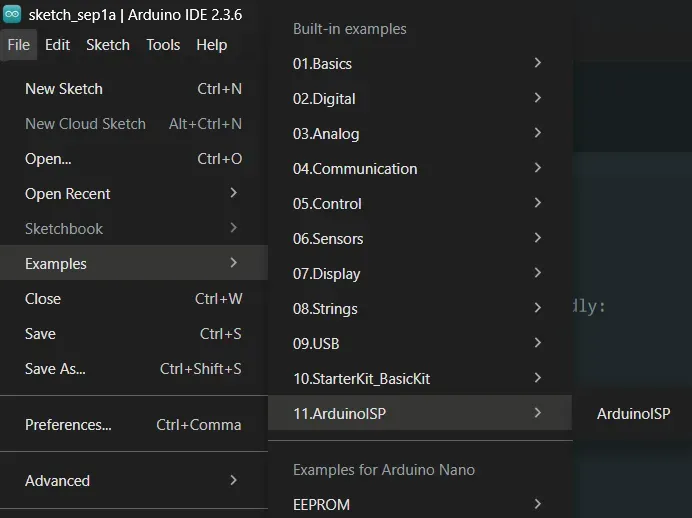
2.1 Open ISP Example
-
In Arduino IDE, go to File → Examples → 11.ArduinoISP → ArduinoISP
2.2 Connect UNO to Nano
| UNO Pin | Nano Pin |
|---|---|
| D10 | RESET |
| D11 | D11 |
| D12 | D12 |
| D13 | D13 |
| 5V | 5V |
| GND | GND |
2.3 Upload “Arduino as ISP” to UNO
-
Select Arduino UNO and the correct COM port.
-
Compile and upload the ArduinoISP sketch.
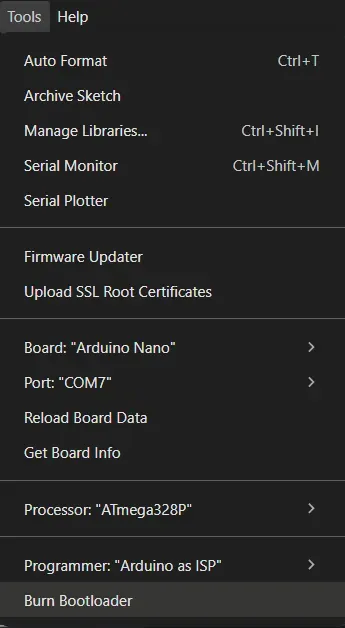
2.4 Burn Bootloader to Nano
-
Keep UNO connected to Nano and the computer.
-
In Arduino IDE:
-
Board → Arduino Nano
-
Processor → ATmega328p
-
-
Click Burn Bootloader.
-
When the console shows
"avrdude done", the bootloader is successfully installed.
Step 3: Test Your Board
-
Open the Blink example in Arduino IDE.
-
Upload it to your Nano.
-
The built-in LED on pin 13 should blink.
Step 4: You’re Ready!
Your zhengbingquant_Nano_V1 is now fully functional. With USB-C and Arduino compatibility, it’s ready for your experiments, learning, and projects.
Purpose:
This project serves as a stepping stone for beginners to dive into PCB design and microcontroller programming. It bridges the gap between learning electronics and practical application, while also being a foundation for future mechanical engineering projects that integrate electronics.
Design Drawing
BOM
 Clone
CloneProject Members
 Empty
Empty
Comment