

 Completed
Trial Multifunctional observer [Waste Soil Heavy Industry]
PRO Trial Multifunctional observer [Waste Soil Heavy Industry]
License
:GPL 3.0
Description
Preface
Old Popsicle reminds you that this device is difficult to make and the material cost is high.

The device produced this time is mainly for functional verification and entertainment, and is not considered for mass production. Please know that.
I should continue to improve the design of various parts, at least the next version will look better than this. 😂
Physical Demonstration
Video:https://www.bilibili.com/video/BV1n94y1p7ki/?spm_id_from=333.999.0.0
(The video will introduce the background, design, production and demonstration of the project in detail)
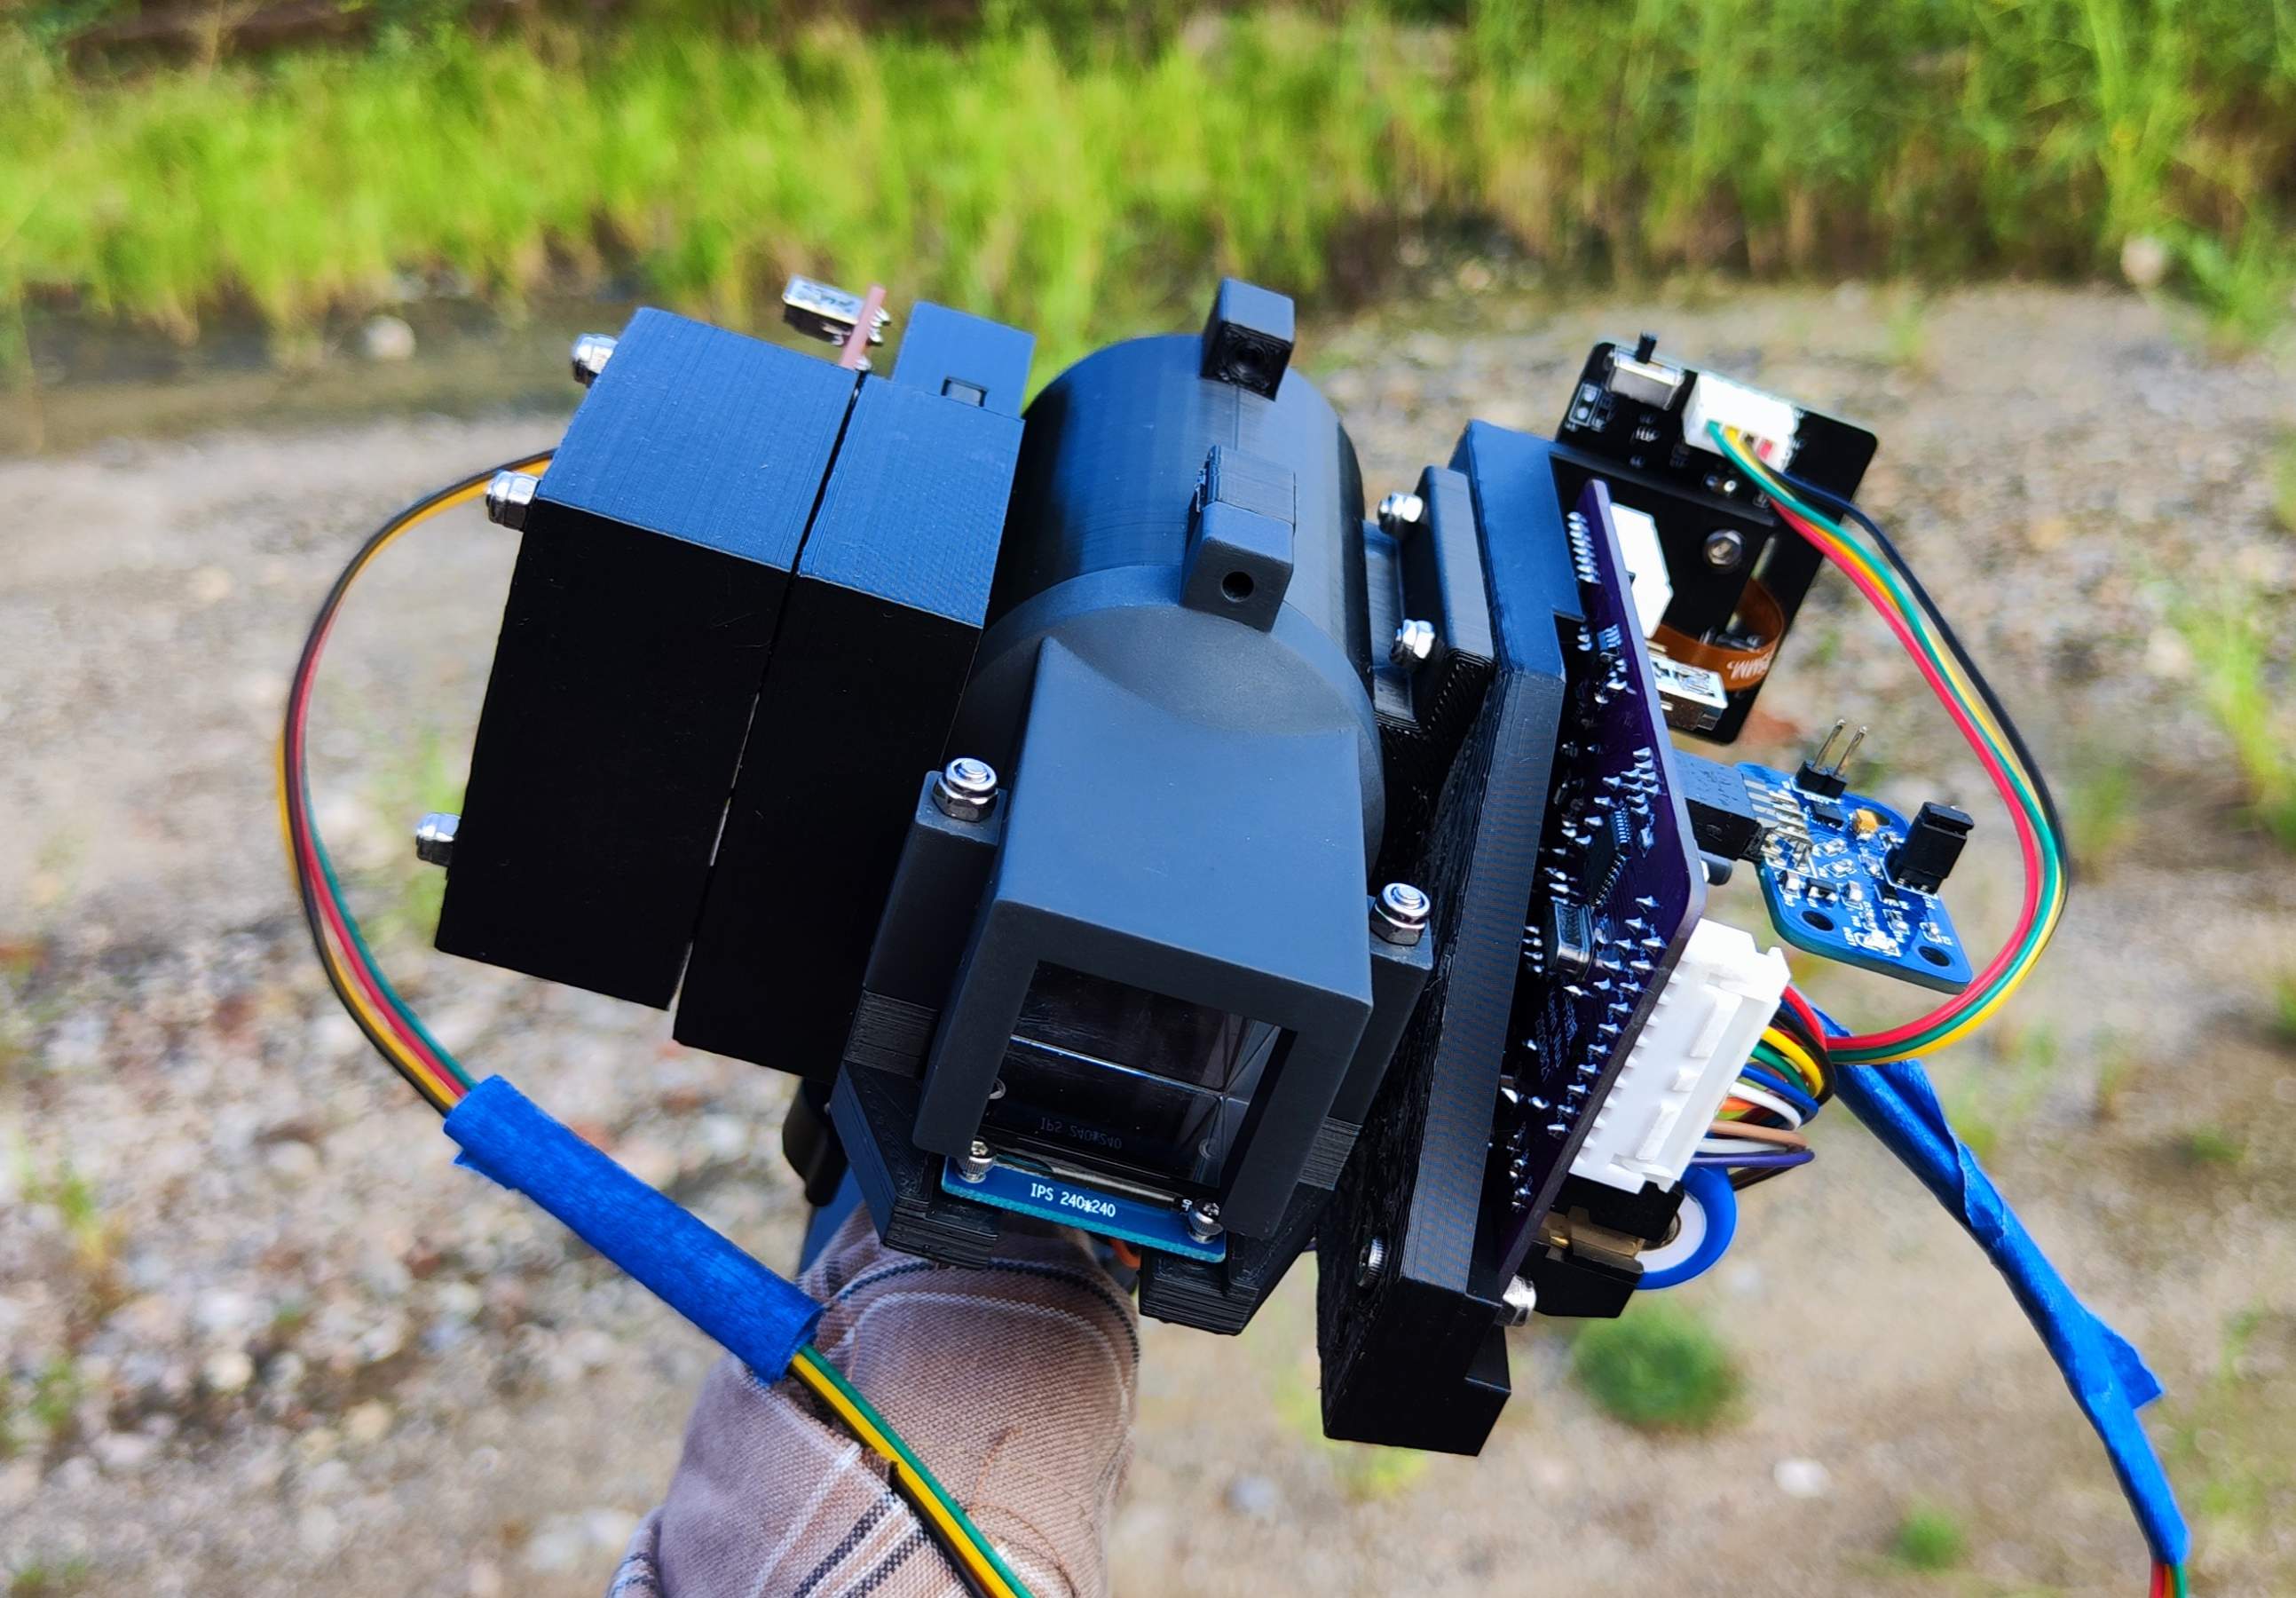
| System physical diagram |  |
| HUD display renderings of environmental parameters |  |
| Geiger counter module alarm renderings |  |
| Observation effect after turning off HUD |  |
Project Description
| Purpose | Try making a multi-functional observer with a heads-up display (HUD). |
| Implemented functionality | It has the functions of short-distance ranging, temperature and humidity measurement, and compass orientation prompts, and the above parameters can be projected onto the HUD; it has a remote video transmission function; it has a Geiger counter module to realize radiation exceeding the standard alarm. |
| Use | It meets the needs of travel enthusiasts to perceive the environment when exploring outdoors, rescue teams to search and rescue in the wild, and fishermen to grasp the environmental situation; in addition, with the addition of a Picatinny bracket, it can be installed on the WARGAME device (the baseline is too high, so it can be used as a peripheral). |
| Significance | Through visualization, environmental parameters are placed in front of users, allowing users to perceive the environment more intuitively. |
| Physical production status | Most of the sensor modules have passed the verification. There are bugs in the ESP32 CAM split screen part (low display frame rate, stripes and freezes) |
Open Source Agreement
According to the GPL 3.0 agreement, the code can be modified at will. Keep open source and build a beautiful hard-created community.
Since the project contains a 400V boost circuit, it is dangerous to a certain extent. The author is not responsible for any negative consequences caused by careless personal operation.
Project Function
1) Measure the ambient temperature, humidity, and orientation information and project them onto the HUD;
2) It can measure the distance of objects at close range (within 2 meters) and project the distance information onto the HUD;
3) Using ESP32 CAM, it can be turned into a remote monitor;
4) Through the additional Geiger counter, the radiation monitoring function is realized, providing the radiation index of the surrounding environment, and there is a screen projection alarm function when the radiation exceeds the standard.
Production Instructions
Materials Required
| Big categories | name | Specification |
| electronic system | Components | Reference BOM table |
| PCB | FR-4 board, double layer board | |
| J305 Geiger tube/M4011 Geiger tube | - | |
| XH2.54 line | 4P,10P | |
| prism glass | 25.4mm*25.4mm*25.4mm | |
|
TFT screen |
1.3 inches | |
| mechanical system |
part |
Refer to the shell file, the production process is not limited |
|
screw |
M2*12,M3*10,M3*14,M3*25,M3*35 | |
|
nut |
M2 lock nut, M3 lock nut | |
| Tools required |
Soldering iron, heat gun, multimeter, regulated power supply, 3D printer (optional) |
- |
Electronic Part
| module | Function |
| Center console | Collect and process sensor data and drive TFT display; the board is also equipped with an ESP32 CAM module, which is responsible for image return |
| Distance sensor and CAM board | Light metering and ranging functions, fixed camera |
| Integrated sensor board | Detect environmental temperature and humidity, orientation, and backup light intensity detection |
| Geiger counter module | Detect environmental radiation index |
Note: Sensor chips are difficult to weld, and there are requirements for welding temperature, equipment and technology; you can use a 240° hot air gun with 183° low-temperature solder paste, but it is best to use 138° ultra-low temperature solder paste.
Mechanical Part
Drawing with SOLIDWORK.
There is no aesthetic design, the wasteland manufacturing only highlights the roughness 😉.
Program Part
Burn the DEMO program to AT MEGA328PB, and burn the CAM routine that comes with the IDE into ESP32.
As shown in the figure below, when burning 328PB, turn the burning switch to the left to enter the 328PB burning mode.

As shown in the picture below, when burning ESP32, turn the burning switch to the right, then press and hold the EN_RST and IN0_RST keys at the same time, first release the EN_RST key, and finally release the IN0_RST key to enter the ESP32 burning mode.

Project Properties
This project is made public for the first time and is my original project.
Project Progress
Phase 1 (2023/8/2-2023/8/16)
Goal: Complete the production and DEBUG of the central control panel; complete the writing of the main program.
Draw the circuit diagrams of the three modules, LAYOUT; first make the central control board, then make the PCB after arrival, perform hardware DEBUG; perform software programming;
Phase 2 (parallel with Phase 1, 2023/8/6-2023/8/22)
Goal: Complete the production of mechanical systems and the production and procurement of corresponding components.
Make mechanical structure, use SOLIDWORK to draw and export STL file.
Phase 3 (2023/8/25-2023/9/11)
Goal: Complete the final assembly and debugging of the electromechanical module.
8/25 Completed the order on 3D Monkey and started making the shell.
Phase 4 (2023/8/25-2023/9/17)
Goal: Complete project closing work.
Summarize and review the production process and publish the project.
Production process VLOG, video upload to B station.
Design Principles
1) The HUD display principle of this project is the same as that of the prism small TV. For detailed principles, please refer to https://www.codenong.com/cs105897213/
2) For circuit design principles, please refer to the " Design Precautions and Related Projects " column below.
Software Related
The DEMO code can run perfectly, the link has been placed in the attachment, and the important code has been commented in Chinese.
Design Considerations and Related Reference Projects
For most chip parameters, it is strongly recommended to refer to official documents. These documents can basically be found in LCSC.
Some key parts refer to the verified designs in Open Source Square and are changed according to the needs of this project. The reference projects are as follows:
[1] ESP32 CAM circuit reference https://oshwhub.com/FJ956391150/esp32-cam
[2] UD display part of the principle reference https://oshwhub.com/guo-0512/holocubic
The Geiger counter module refers to the following two projects, both of which are based on Emmanuel Odunlade 's GC-20 Geiger counter https://www.electronics-lab.com/project/new-improved-geiger-counter-now-wifi/ :
[3]https://oshwhub.com/xxdz12345/gai-ge-ji-shuo-qiili9341tft-chu-mo-ping-ban
[4]https://oshwhub.com/yanranxiaoxi/Multi-adaptation-Wi-Fi-Geiger-Counter-Double-Tube-Type
On the basis of these works, a 6*30 fuse holder is added as a better fixing measure, which can be adapted to install J305 and M4011 Geiger tubes.
DEBUG
1) When debugging the ranging module, the data cannot be read and there is a problem with the program. There are basically no VL53L3X programs on the market that are adapted to 8-bit microcontrollers (basically they are adapted to STM32). I went outside to check and found that none of the open source experts have implemented an adaptation program.

(Picture source POLOLU official website)
You can only replace the VL53L0X . The pins of these two modules are pin to pin, so there is no need to re-print the board. After verification, the board can be replaced with VL53L0X, and the ranging effect is good.
2) It is best to buy important components (such as LDO, DCDC and other power chips) in regular shopping malls; the TVL1117-3V3 bought by Aubao is not good, and my first test board burned when I powered it on.
The function verification video is as follows. For the full version, please see the video at the top.
Designed by Kuznetsov (from OSHWHub)
Link:https://oshwhub.com/kevin_wuu/dai-tai-tou-xian-shi-de-duo-gong
Design Drawing
 Empty
Empty
Comment