

 Completed
laser engraving machine
PRO laser engraving machine
License
:GPL 3.0
Description
Description
Design a cantilever mechanical structure of the laser engraving machine, exquisite, functional, easy to use desktop laser engraving machine.
The project is open source and mainly includes the following parts:
1. Laser engraving machine main mechanical structure
2. Master hardware circuit diagram, PCB board
3. Related Marling firmware
4. Upper computer
Analysis of works
The laser engraving machine is mainly composed of a PC, a single-chip microcomputer, an XYZ axis limit sensor, an XYZ axis stepper motor, a stepper motor drive, an XYZ transmission shaft, a laser head, and other parts.
First, the text or image to be printed is imported into the software, and through simple parameter settings, the software transmits data to the microcontroller through the serial port module. After positioning the workpiece, the microcontroller controls the precise movement of the stepper motor to achieve accurate engraving of the workpiece. After waiting for a while, the engraving task is completed, and the engraving ends here.
Overall block diagram of system design

Functions related to the work
1. Preliminary positioning through limit switch.


3. The upper computer, through PWM control of the laser beam of light.

4. The height of the Z-axis can be adjusted by the wire rod to meet the carving of objects of different heights.

5. The upper computer can control the movement speed of the laser head.
Attributes of the work
1. Laser engraving machine main body
There are two versions of the overall design, as shown in the following figure.


The main difference between the two versions lies in the different main architecture of the laser engraving machine. When assembling the laser engraving machine V1.0, there was an unstable forward tilt phenomenon, which may be due to the lack of force analysis and rough results during modeling, and basically cannot meet the requirements. The V2.0 architecture design of the laser engraving machine is more stable, with higher accuracy, easy installation, easy use, fast movement speed, and can perfectly engrave physical objects.
2. Main control board
2.1 Master
This is the PCB controller, the picture is as follows:

After testing, it has certain minor problems and will be improved later.
2.2 Main control and expansion board combination
We use the Ramps 1.4 expansion board, which is widely used in 3D printers and engraving machines. It is reserved for various interfaces such as stepper motor driver interface, 12V power interface, limit switch interface, PWM control interface, etc.


3. Stepper motor driver
This project uses the TMC2225 motor drive module, which is divided into 16 segments.

TMC2225
4.220V to 12V DC power module
Stepper motors require a 12V power supply to drive, which requires a 220V to 12V DC power module, as shown in the figure.

5. Guide rail

6. Serial port module
The serial port module is a communication module between the control board and the host computer. Its main function is to receive signals sent by the host computer, complete corresponding actions, and feedback the execution results to the host computer.
Software instructions
Convert G-code software
We need to convert images, text, etc. into G code so that machines can recognize them and perform systematic carving. We use Inkscape software to convert vector images into G code.

Upper computer operating software
It can control the operation of the machine, turn on the laser head, control the motion speed, laser intensity, and display the real-time trajectory of the engraving.

Marling Firmware
The main controller uses Arduino 2560, and the compile environment uses Visual Studio Code. The software mainly includes motor motion, protocol parsing, storage strategy, etc. The drivers mainly include communication, Flash driver, motor driver, switch driver, etc.

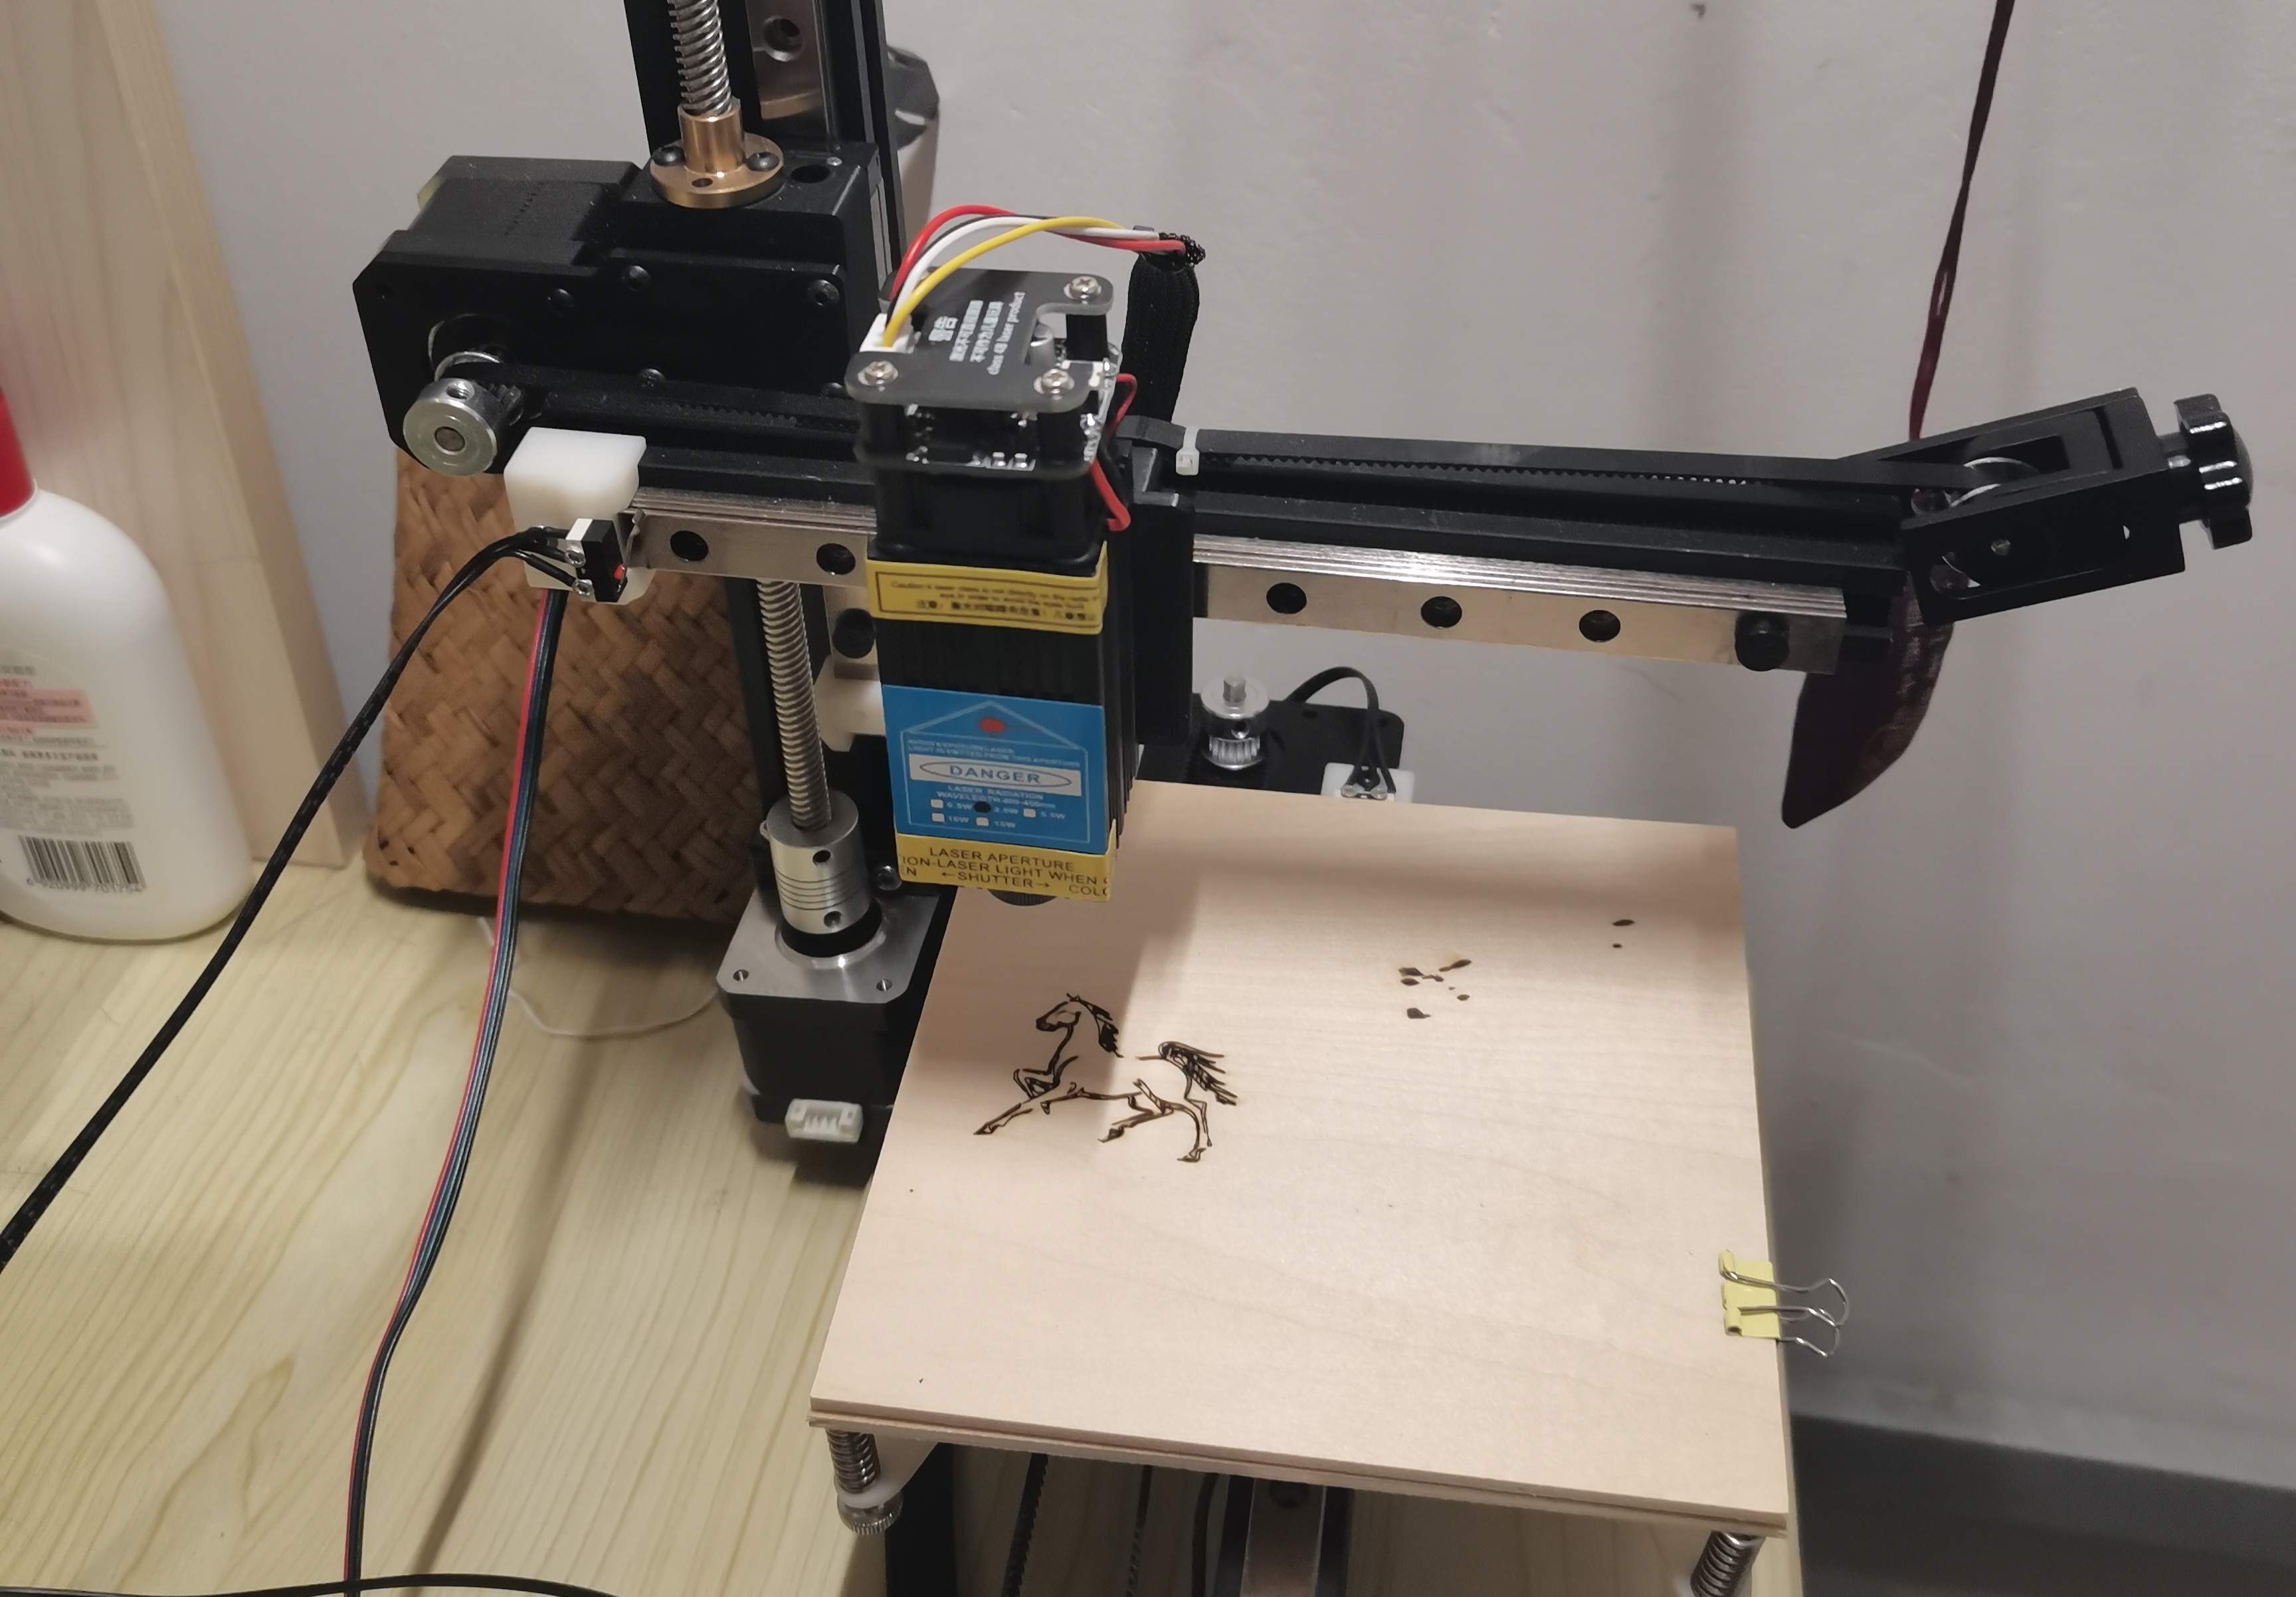
Physical display

Laser engraving machine V2.0
Video link:
Designed by 守望者 (from OSHWHub)
Design Drawing
 Empty
Empty
Comment