

 Completed
[Knob numeric keypad] 32U4
PRO [Knob numeric keypad] 32U4
License
:GPL 3.0
Description
Introduction
After six and a half months, I'm back with a new keyboard.
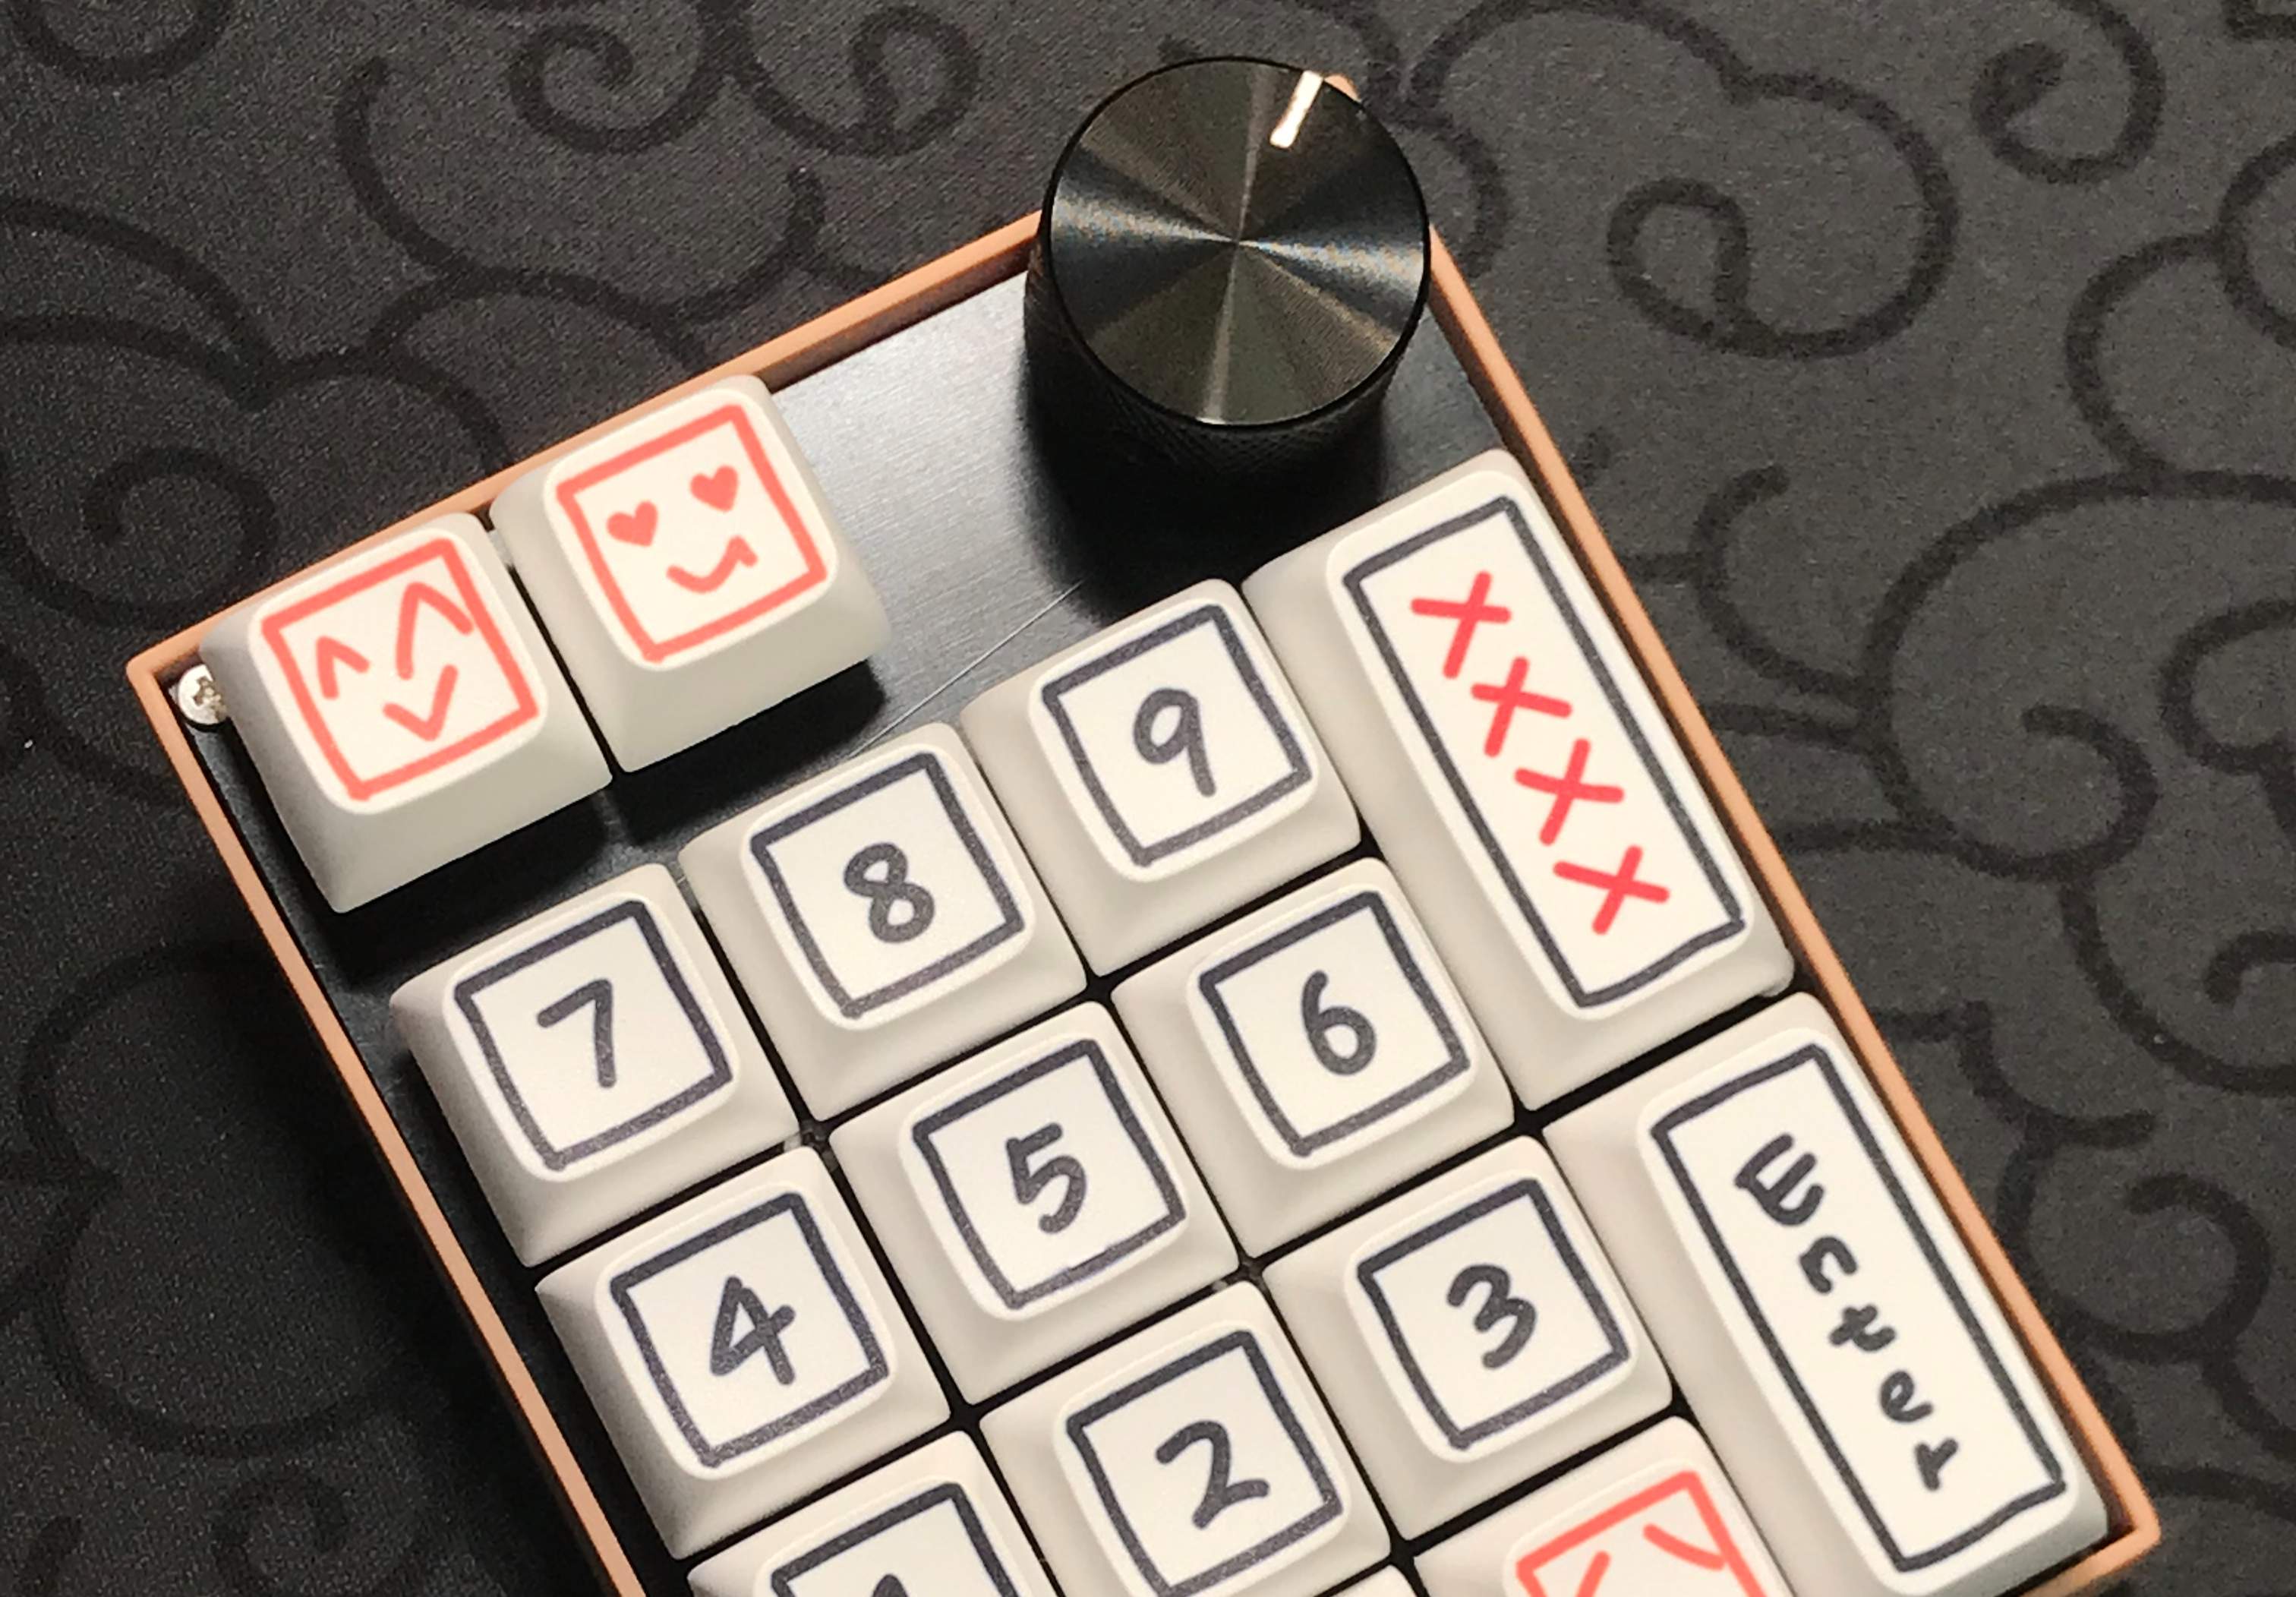
This time we bring a 15-key numeric keypad based on QMK firmware design.
The reason for dragging it out for so long is that the mismatch in structure caused me to spend hundreds of extra money on the final perfect fit after seven PCBs and six 3D printed shells.
This time the difficulty level has increased compared to the previous three-key keypad, but not much .
First of all, I would like to thank the source of inspiration for this project.
The most basic 17Toutch mechanical numeric keypad: https://oshwhub.com/yANgZEN/zui-gai-shuo-zi-jian-pan
Old Xuan retreat pit keyboard _84 KEYS_1 ENCODER: https://oshwhub.com/Neilzx/zhong-ji-tui-shao-jian-pan
Next are the tutorials, projects, and tool links involved in this project.
QMK Official Manual: https://docs.qmk.fm
My recommended QMK tutorial: Bilibili up master - HiryKun https://space.bilibili.com/50496994
QMK compiler QMK MSYS: https://msys.qmk.fm/
QMK Downloader qmk_toolbox: https://github.com/qmk/qmk_toolbox
Basically, that's all. If there's anything missing, I'll add it later.
Just like the three-key keypad project, this time it is also written according to the overall process. Please point out any mistakes or omissions.
Major update
July 25, 2023: After experiencing the torment of multiple updates to QMK for half a year, I finally finished the code based on QMK0.21.6. The source code and hex burning file have been updated to the project attachment! The following picture is the key diagram. (I'm too lazy to write two layers of buttons. If necessary, you can ask me to change it or use the source code to change it)
Please note: This code update only applies to QMK0.21.6 version!!!

On July 27th, 2023, the online key modification of the vial has been successfully implemented. The picture shows the vial interface. The vial version of the hex burn file and source code have been uploaded in the project attachment.

Update
March 26, 2023: Some parts of the code are missing, it is not the complete version of the code, and it is being urgently restored.
Keyboard schematic and PCB section
The power board is designed as a 12p TYPE-C interface, connected to the SL2.1A USB2.0 HUB hub, which leads to two USB female sockets and an FPC terminal for connection to the main board.
It should be noted here that:
DP and DM signal lines are recommended to be connected in the form of differential lines.
The width of the power cord needs to be greater than 12mil. Because the output voltage of the computer's USB interface is 5-5.5 V and the maximum current is 500mA, the calculation shows that the required line width for 1oz copper thickness is about 12mil. It is recommended to use 15mil.
Pay attention to the placement of the filter capacitor.
Think ahead about the position and size of the positioning hole to avoid having to play many versions like me before succeeding.
If the power indicator light is placed next to TYPE-C, there may be a mysterious problem that the light cannot be turned on (I encountered it anyway). It is recommended to place it further away from TYPE-C.
The main board uses a very common ATMEGA32U4-AU controller, and the external circuit is also very simple, just follow the drawing. Diodes are used to achieve the functions of anti-ghost keys and full-key non-collision. When drawing the schematic diagram, pay attention to the placement direction of the diode, which determines the current direction when writing code later. The hot-swappable + WS2812 + five-pin axis schematic diagram and packaging are drawn by myself. You can use mine or draw it by yourself, and it is not difficult. If you draw it by yourself, you can also draw the light hole smaller. Please refer to the data manual of the lamp for details. The used is EC11, and the corresponding packaging is also available in the EDA of Lichang.
It should be noted here that:
The FPC terminals on the main board should correspond to the wires on the power board, because they need to be connected with FPC cables. Be sure to think carefully when drawing.
The position of the positioning hole should not only consider the connection with the shell, but also the connection with the positioning plate. At the same time, when placing it, it is necessary to consider that the copper pillar cannot overlap with the components after installation.
It is recommended to add support columns at the satellite axis. Some satellite axes are too tight and will press down the positioning plate.
The FPC terminal needs to be connected to the signal line 32U4 through differential. If possible, it can be connected, but the length can also be equal.
The thickness of the power board and the main board are both 1mm!!!
QMK firmware code writing and burning
In the QMK code, my evaluation is sometimes really torturous. I was stuck for two or three weeks before and didn't know why I reported an error. I asked a big boss but didn't solve it. Finally, I went to the official QMK discussion group to send the code out and found out why. It was just because I wrote Chinese comments. Advice: Don't write Chinese comments!!!
For specific code writing, please refer to the new tutorial by Bilibili content creator - HiryKun, or you can use my code. After all, QMK has been updated to 0.20, and HiryKun's tutorial is a bit outdated.
Overall, it is better to focus on the official QMK documentation. I suggest reading the English documentation and translating it into Chinese, rather than directly reading the Chinese translation version. If you encounter any problems, you can ask the boss or go to the QMK forum. If necessary, you can also ask me. I hope everyone will not be as depressed as I was before.
The attachment provides my code, so I won't provide the compiled file. I hope everyone can write and compile it themselves for fun.
Shell and structural design
The shell is also where I spend the most money. 3D printing is really expensive, especially when it comes to hiring someone to do it. This time, only the shell version is provided because I think it's too ugly without a shell. Everyone is welcome to be creative and switch to other shells such as acrylic. The cost of my 3D printing is nearly 100 yuan plus postage, with 0.02 precision light curing, for reference only.
Annexes introduce
The attachment includes the positioning plate SW file of this project, the SW shell file with my logo, the code Compressed Packet, and the size diagram of the 2U satellite axis.
Picture introduction


Thank you for browsing so far! Wish you a smooth project!
Designed by PhantomR (from OSHWHub)
Link:https://oshwhub.com/phantomr/test-shu-zi-jian-pan-ji-chu-ban-32u4
Design Drawing
 Empty
Empty
Comment