

 Completed
[Crystal Heart lamp]Heart LED
PRO [Crystal Heart lamp]Heart LED
License
:GPL 3.0
Description
The spark of creative inspiration spreads into a sea of fire, and it looms as it should be.
Brief introduction:
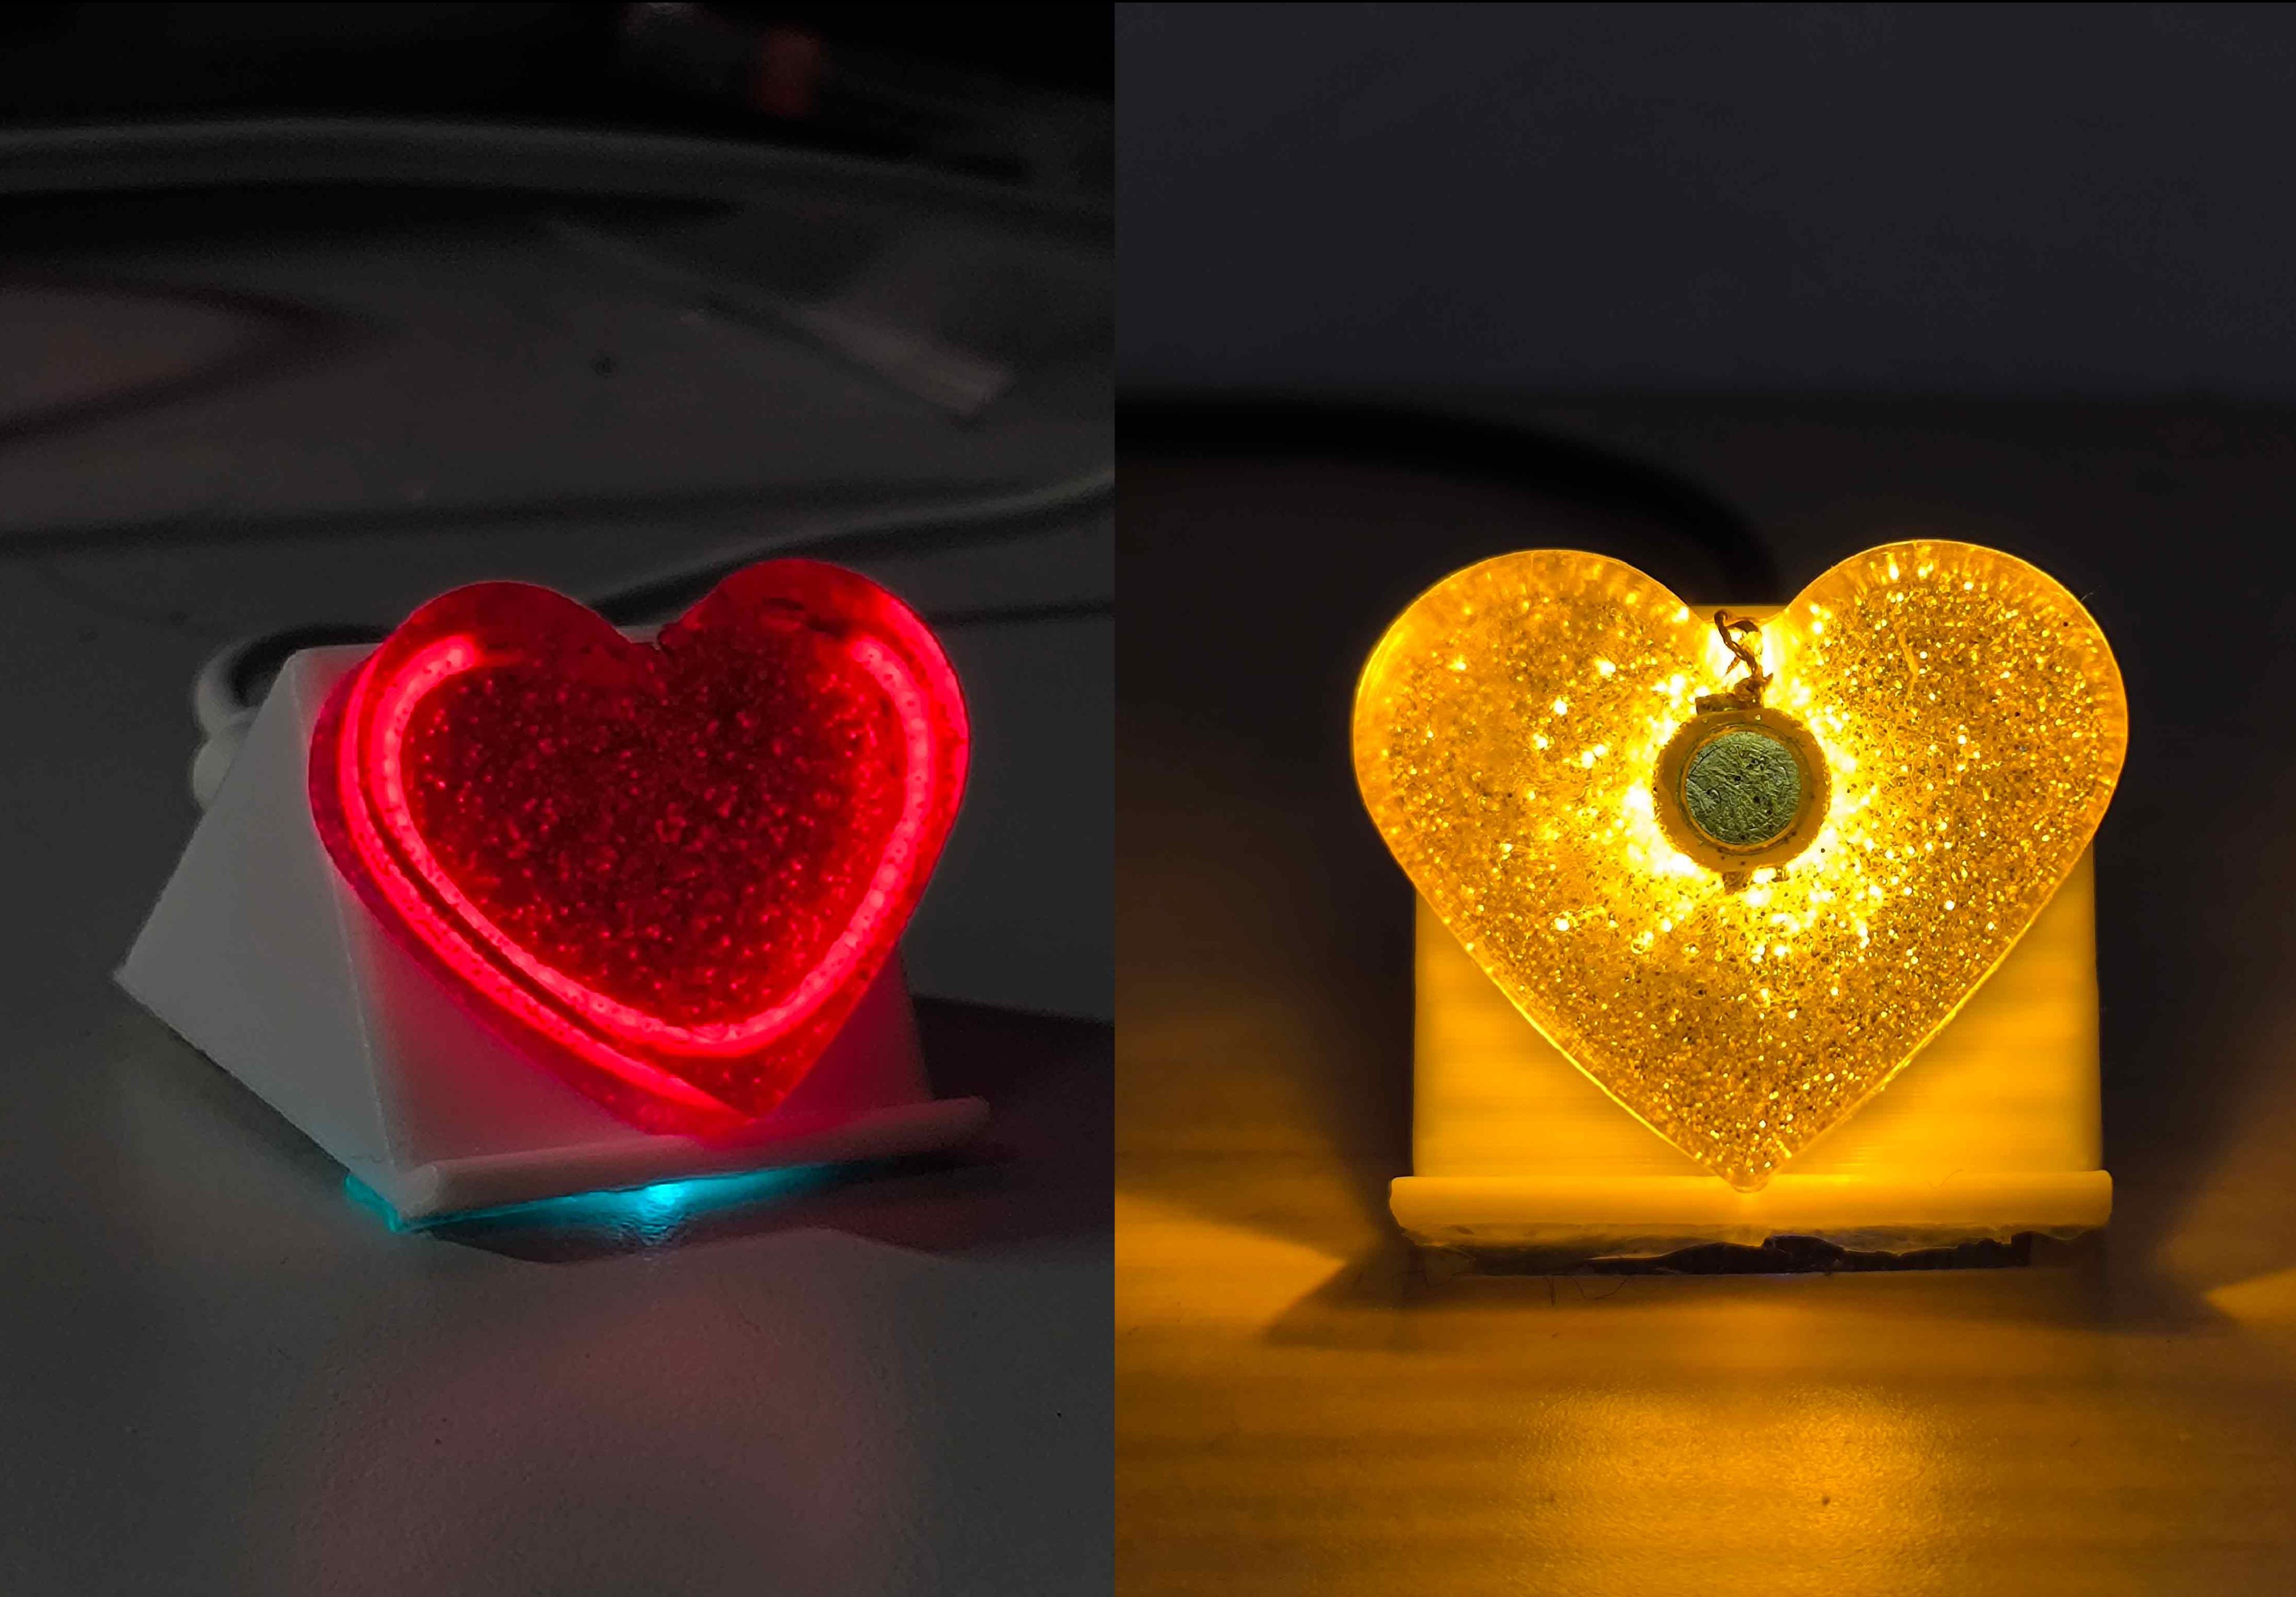
Heart LED combines glue with hardware to provide a great viewing effect and show the charm of hardware.
Function introduction:
- Human body sensing: When a human body is detected, the brightness sequence in the set parameters is automatically executed.
- Adjustable brightness: Support 255 levels of LED brightness adjustment.
- Ambient Light Adaptive (alpha): Automatically adjusts the LED brightness according to the ambient light.
- Bluetooth Parameter Tuning: Heart LED can be wirelessly controlled through Bluetooth, and the mode and parameters can be set.
Manufacture method:
- Mix transparent crystal epoxy glue (AB glue), and mix with an appropriate amount of glitter powder (the color is optional, it should match the LED color), stir.
- Seal the LED lamp/filament into the transparent crystal epoxy glue (AB glue), draw out the positive and negative poles of the LED, pay attention to the position of the fixed LED, and let it stand for 48 hours.
- The molded crystal heart lamp is fixed on the base of the 3D printing, and the positive and negative poles are connected to the made PCB, and the human body sensing module is connected and fixed.
- Cut the appropriate size acrylic sheet and seal the bottom with UV glue or hot melt glue.
PCB produce:
Materials:
Main MCU: Air001
Bluetooth module: PW05
Human body sensing module: Hilinker LD1020 (Note: replace the module resistance R14 with a resistance of about 374KΩ, the distance is more appropriate)
LED: High Power LED Golden 1W/Flexible Filament Red 1W 80mm
Regulated LDO: ME6211C33M5G-N
Photoresistor: 5516
Burn:
The high level of the BOOT pin enters the programming mode, and the 4 interfaces (BOOT+, RX, TX, GND) on the PCB can be burned (no additional power supply is required)
The first step is to burn the Heart_LED-preload file to change the name of the PW05 module to Heart_LED.
The second step is to burn Heart_LED-hardware to complete the writing of the main program.
When burning, change the main frequency to the highest frequency.
Usage:
Power the Heart LED, download and open the Heart LED APP, wait for the automatic connection (the Led at the bottom will turn off), enter the command. (For the command, please refer to the internal instructions of the APP)
Code Download:
- Through the attachment
Process Pictures:


APP Interface

Designed by 边寒 (from OSHWHub)
Design Drawing
 Empty
Empty
Comment