

 Completed
2.9-inch/1.54-inch desktop ink display
PRO 2.9-inch/1.54-inch desktop ink display
License
:Public Domain
Description
This project has made hardware modifications to the previous version ( ESP32C3 2.9-inch ink screen ornament ), added a battery power supply module and drawn a PCB version adapted to the 1.54-inch ink screen. The software layout is an adapted version of the 1.54-inch ink screen completed in the program.
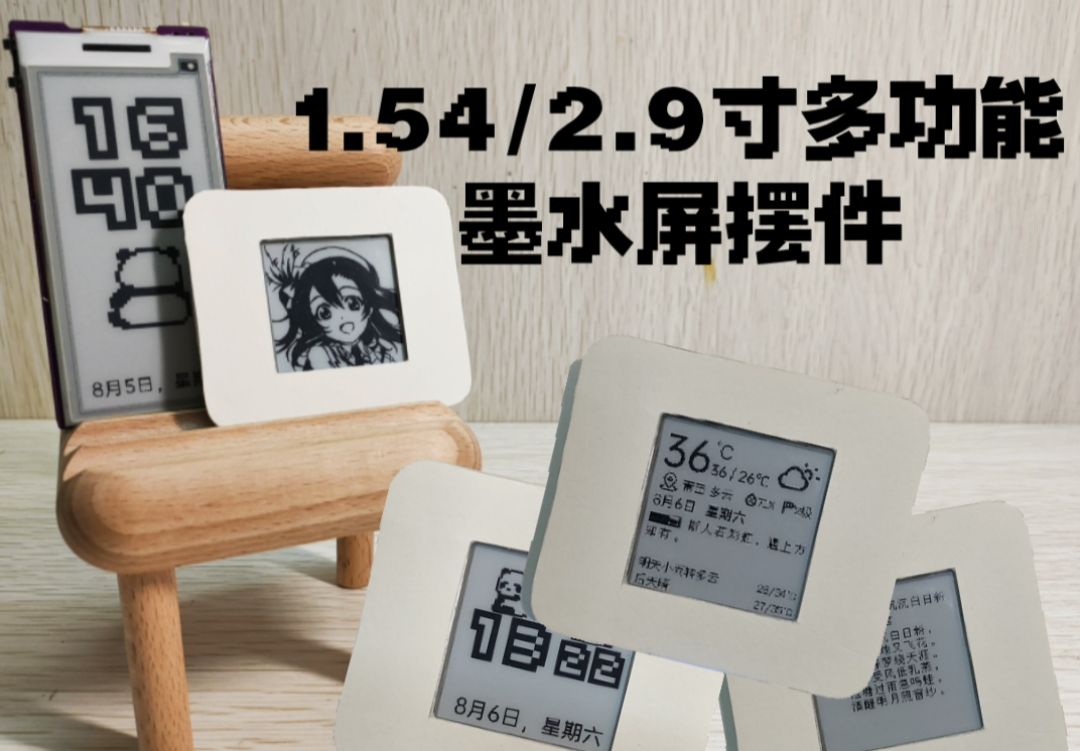
1 Effect Display
The effect display of the project can be seen in the video of Station B: [Ink Screen] Four modes of desktop gadgets! The battery version is suitable for 1.54 inches ~ making the desktop no longer monotonous.
2 Hardware Aspects
2.1 Ink screen

The ink screen models used in this project are: 2.9 inches: HINK-E029A01 1.54 inches: HINK-E154A05.
The ink screen was purchased from Xianyu. Both are black and white dual-color ink screens with 24P pins. Since partial refresh is used in the program, it may not drive properly if three or more colors are used. Other models of ink screens have not been tested yet, but the driving circuits of most ink screens are relatively common and can be tested by yourself.
2.2 Main Control Module

Use the Hezhou ESP32C3 development board as the main control to control the ink screen through the corresponding drive circuit. The development board adopts a stamp hole design, so in this project the entire development board is regarded as a patch component and welded to the PCB board to save space. There are two versions currently on sale on the official website: classic and simple. Both styles can be used in this project. I personally recommend that beginners start with the classic style. Its programming is simpler and less likely to be pitted than the simple style.
2.3 Power management circuit

This project implements power management through the ETA6093 chip. ETA6093 is a switching lithium battery charger that can provide 1.2A charging current to the battery and provide 5V/1.2A boost output operation. It only requires one inductor to achieve bidirectional power path management. Perform automatic mode detection and switching.
In this project, it is connected to the USB power supply port on the ESP32C3 development board. When using USB power supply, the ETA6093 chip is in charging mode to charge the lithium battery. When the USB power supply is disconnected, the lithium battery boosts the output through the ETA6093 to power the development board and ink screen screen. In addition, USB power supply does not affect the downloading of programs to the development board through USB. The battery lithium battery model in the project is 301048 (3*10*48mm). Since it is not designed for low power consumption, the use and standby time are short. When using desktop ornaments, it is recommended to use USB power supply.
2.4 Switch button
In this project, a toggle switch is used to turn the device on and off, and two buttons are used to realize control switching of the interface and mode.
3 Software aspects
3.1 Development tools
This project is developed using Arduino and requires the installation of Arduino's ESP32C3 support. If it is not installed, please find the relevant information and install it yourself.
The network disk information is provided here to help you quickly configure it. How to use it can be seen in the video of Bilibili.
Network disk address: Link: https://pan.baidu.com/s/1ELNBuo_a1YlaOqj3Q381AQ?pwd=lfxy
3.2 Arduino library
Use the Arduino Library management tool to install the following five dependent libraries:
①The ArduinoJson library parses Json data. The weather, ancient poems, famous quotes and other information in the project are obtained through some APIs and stored in the returned json data.
②GxEPD2 library. Drives ink screen.
③Time library. Configuration time is used.
④The Timezone library. Switch time zones is used.
⑤U8g2 library. Image display library.
3.3 Program compilation and download
1. "C:\Users\xxx\AppData\Local\Arduino15\packages\esp32\hardware\esp32\2.0.0\variants\esp32c3"
    static const uint8_t SDA = 4;    //8
    static const uint8_t SCL = 5;     //9

    static const uint8_t SS    = 7;
    static const uint8_t MOSI  = 3;   //6
    static const uint8_t MISO  = 10;  //5
    static const uint8_t SCK   = 2;   //4
This configuration is modified with reference to the pin definitions of the Hezhou development board.

2. Download the program in the attachment and use arduino to open the .ino file with the same name in the folder.
3. Select the development board as ESP32C3 Dev Module; select the corresponding download method: if it is a simple model, select Internal USB, if it is a classic model, select UART0; finally, select the correct port.

4. Click Download and wait until the download is successful after compilation.
3.4 Firmware burning download
If you do not want to compile and download through Arduino, you can also burn and download the firmware. The steps are as follows:
1. Download the burning tool esptool
Official address: https://www.espressif.com.cn/zh-hans/support/download/other-tools
Note: The esptool version when this project was released was V3.9.2
2. Modify the configuration of the burning tool
The official version needs to modify one configuration to be successful:
① After executing the exe file for the first time, a configure folder will be generated in the directory. Open spi_download.conf in the following path with Notepad.
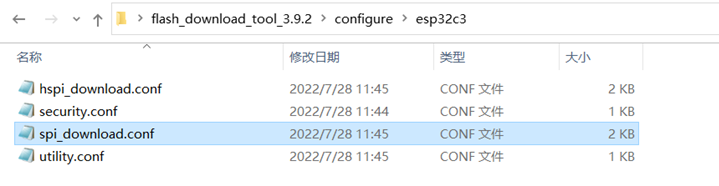
② Change flash_size = keep to flash_size = 4MB and save the file.

3.5 Firmware burning
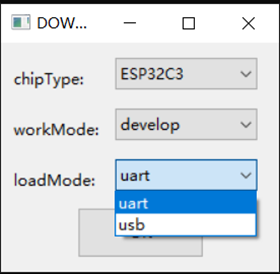
① Run the exe file and select the following options. For the classic model, select UART download, and for the simple model, select USB download.
② Select the bin file downloaded from the attachment, the burning address is 0x0 , and the rest of the configuration is as follows.
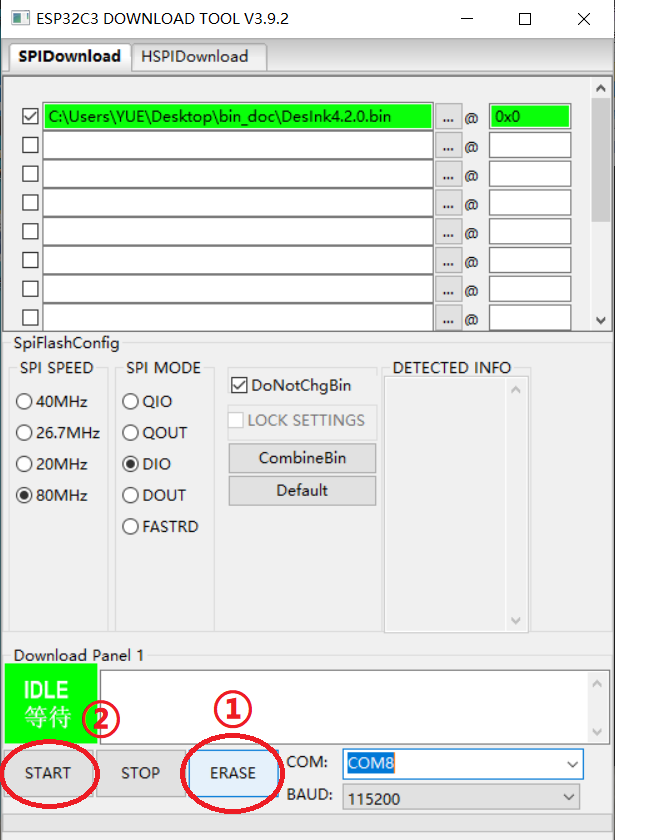
③ First click the ERASER button to clear, and then click START to burn. The simple model needs to enter the download mode when burning: press and hold the boot button and then power on.
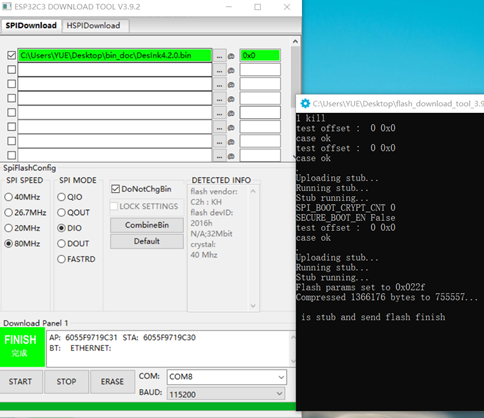
④ Once the program is burned successfully, it can be run.
4 Function Implementation
4.1 DesInk folder description
①The DesInk_x.xxino file with the same name as the folder is the file where the main program is located (xxx is the version number).
②The Config.h file is a configuration file, including reference libraries, configuration parameters, global variables, function definitions, etc.
③The AncientPoetryPage.ino, DinosaurPage.ino, WeatherPage.ino, and WifiConfigPage.ino files are files containing related functions of the ancient poetry interface, clock interface, weather interface display, and WiFi configuration interface respectively.
④CallHttps.ino is the implementation of server connection and data request functions; GetSentence.ino is the implementation of functions related to obtaining ancient poems and famous quotes through the API; GetWeather.ino is the implementation of functions related to obtaining weather information through the Xinzhi Weather API; NTP.ino It is the related function of obtaining time through NTP; WebSever.ino is the implementation of setting esp32c3 as the server for network configuration and other functions.
⑤GB2312.h and MyIMG.h contain relevant data of Chinese fonts and pictures.
4.2 Overall framework description

The overall framework and development ideas of the project are shown in the figure above:
①As an IoT chip, ESP32C3 is first connected to the Internet in this project to facilitate subsequent acquisition of relevant data from the network. (This project also takes into account the offline scenario. When the network fails, it will automatically enter offline mode. In offline mode, only the patterns saved in the memory can be switched to display.) In this project, the built-in WebServer library is used and written The HTML code of the web page to implement this function. After the network is configured, the saved WiFi name, WiFi password, weather key and other data will be saved to Flash through the relevant functions of the EEPROM library , so there is no need to reconfigure it the next time it is used.
The ink screen models used in this project can all be driven through the GxEPD2 library . Combined with the U8g2 library , text and patterns can be arranged and displayed more conveniently.
②After successful networking, when in clock display mode, obtain the time through NTP based on the WiFiUdp library . After obtaining the time, synchronize the time to the local computer through the Time library and display it on the Ink Screen. When in the weather or poetry interface, the corresponding API interface is accessed through the HTTPClient library , and the returned JSON format data is parsed using the ArduinoJson library , and finally the obtained data is displayed on the ink screen.
③ By polling the status of the two buttons, the mode switching and data refreshing are realized.
5 How to use
5.1 First time use
The configuration method for first use is the same as the previous version, please refer to: ESP32C3 ink screen ornament - JLC EDA open source hardware platform (oshwhub.com)
5.2 Daily use
① Switching on and off and charging
The toggle switch can be turned on and off, and the blue LED light on the back is always on when it is turned on. The device can be charged through the USB port. During the charging process, the power on and off state can also be set by flipping the switch. The green LED light flashes during the charging process and remains on when it is fully charged.
②Mode switching and updating
Press the MODE button to switch modes and press KEEP to update. For modes that require the Internet to obtain information, such as weather and ancient poetry interfaces, the switching speed is directly related to the quality of the network signal. If the network is poor, you need to wait a while.
It is not recommended to refresh frequently in the ancient poetry mode, as it may easily cause the website to be limited, and you need to wait for about an hour before it can be used normally. Since there are many rare characters in ancient poetry, there will also be certain missing characters.
③Configuration mode
Long press the MODE button until the red light goes out and then release it to enter the configuration mode. Pressing KEEP in the configuration mode will clear the configuration of the connected WiFi and restart to enter the network configuration interface. (Equivalent to restoring factory settings)
6 Material Table
For the material list, you can view the attachment "Battery Model List.xlsx".
Designed by SMALL_DA (from OSHWHub)
Link:https://oshwhub.com/small_da/2.9cun-zhuo-mian-mo-shui-ping-ba
Design Drawing
 Empty
Empty
Comment