

 Completed
ESP32-C3 SuperMini Based 3-Channel Relay Board for IoT Home Automation
PROESP32-C3 SuperMini Based 3-Channel Relay Board for IoT Home Automation
License
:OpenAtom OHL 1.0
Description
Overview
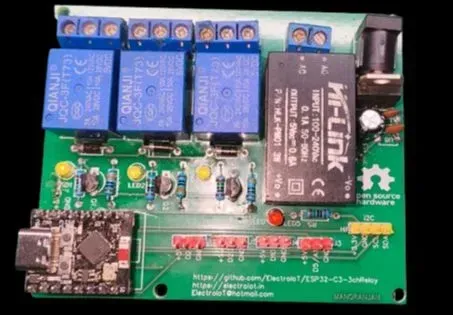
This DIY project is a 3-channel relay module based on the ESP32-C3 SuperMini, perfect for controlling home appliances like lights, fans, or AC sockets over Wi-Fi using Tasmota firmware. It supports I2C sensors like DHT11 or BMP280, enabling environment-based smart switching.
🧩 Key Features
-
✅ 3 Relay Outputs (AC/DC load control)
-
✅ ESP32-C3 SuperMini with Wi-Fi & BLE
-
✅ Supports Tasmota firmware (web-based control + MQTT)
-
✅ Voice control via Alexa and Google Home
-
✅ Onboard 5V DC Regulator (supports 220V AC input via Hi-Link)
-
✅ I2C Expansion Header (connect sensors like DHT11, BH1750, BMP280)
-
✅ Power and Relay Status LEDs
-
✅ Compact and reliable PCB design
🔧 Hardware Used
| Component | Quantity |
|---|---|
| ESP32-C3 SuperMini | 1 |
| SRD-05VDC-SL-C Relays | 3 |
| Hi-Link HLK-PM01 (5V) | 1 |
| 7805 Voltage Regulator | 1 |
| 1N4007 Diodes | 3 |
| BC547 Transistors | 3 |
| 10k Resistors, LEDs | 3+ |
| Screw Terminals | 5 |
| I2C Header (3-pin) | 1 |
| DC Jack (optional) | 1 |
⚙️ Schematic Design
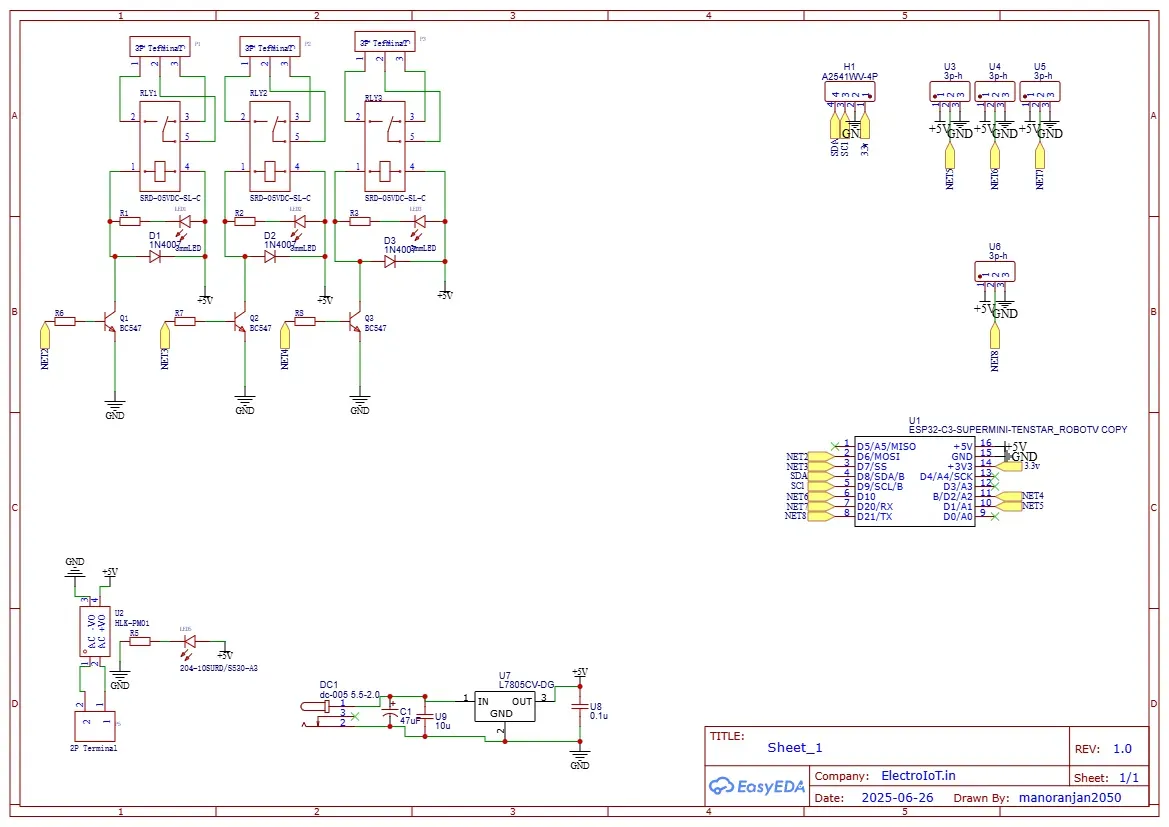
The design includes:
-
Transistor driver circuits for each relay
-
Flyback diodes to protect against voltage spikes
-
7805 voltage regulator to step down from 9–12V to 5V
-
Onboard Hi-Link 5V AC–DC module for direct AC input
-
I2C breakout header to connect sensors like DHT11
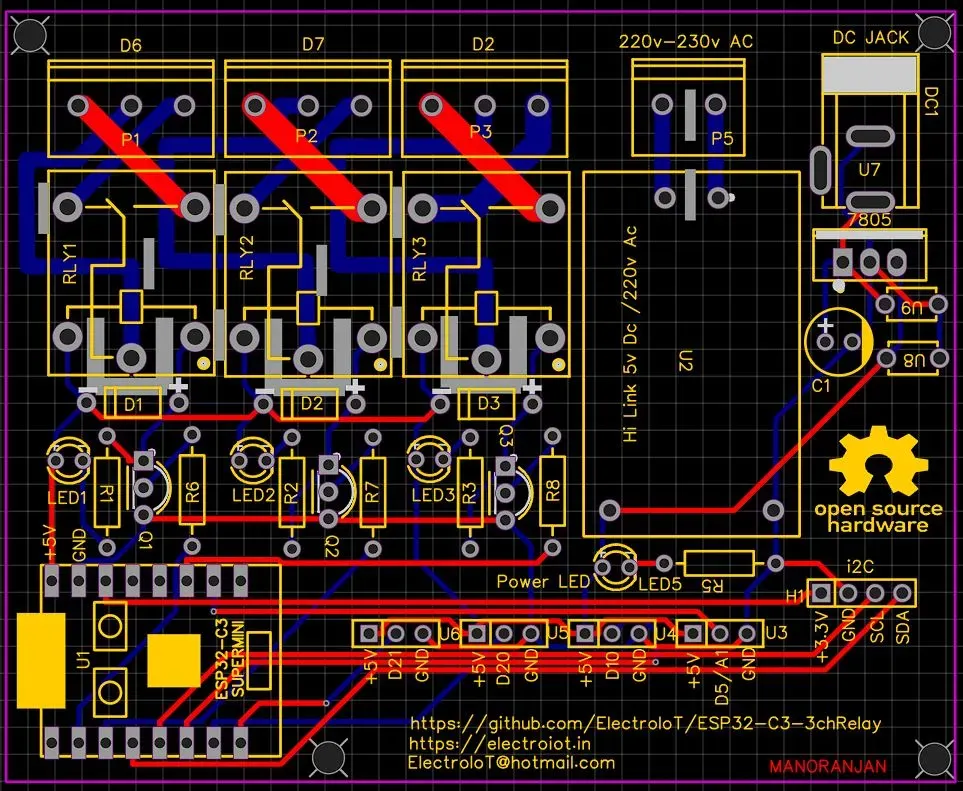
🖥️ PCB Layout and 3D View
🟨 PCB Design (Top View)
🔵 3D Preview
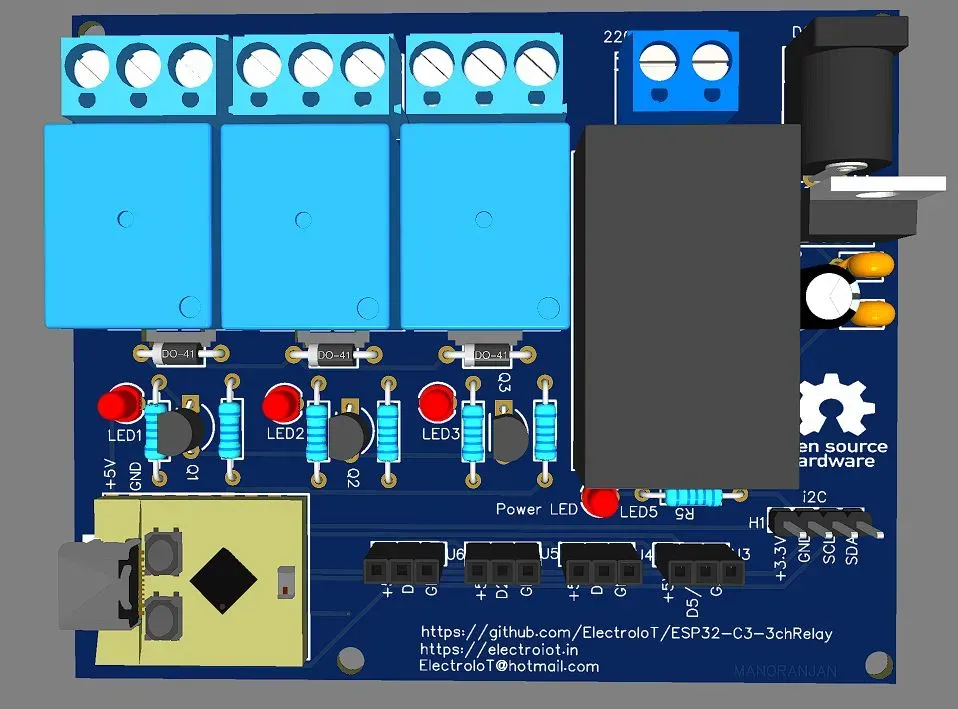
A clean and compact board with:
-
Isolated AC/relay side
-
ESP32-C3 mounting
-
Power indication
-
Screw terminals for safe connection
🌐 Firmware: Tasmota
This board is 100% Tasmota compatible with the ESP32 build:
-
Flash Tasmota for ESP32-C3 using Tasmota Web Installer
-
Configure GPIOs in Tasmota:
-
Relay1 → GPIO10
-
Relay2 → GPIO3
-
Relay3 → GPIO21
-
I2C SDA → GPIO4
-
I2C SCL → GPIO5
-
-
Connect to Wi-Fi and control via MQTT, Alexa, or Google Assistant
🌡️ Add-ons via I2C
Easily connect sensors like:
-
DHT11/DHT22 – temperature/humidity
-
BH1750 – light intensity
-
BMP280/BME280 – temperature/pressure
Connect them to the I2C header and configure in Tasmota.
💡 Use Cases
-
Turn on/off lights, fans, water pumps
-
Automate devices based on sensor data
-
Monitor temperature and humidity
-
Integrate with Home Assistant, Node-RED, or openHAB
🛠️ Build Tips
-
Ensure proper isolation between AC and low-voltage sides
-
Use heat shrink on AC terminals for safety
-
Double-check Hi-Link input/output polarity
-
Always test with a multimeter before applying AC power
GITHUB Repo For Code And Other Details
https://github.com/ElectroIoT/ESP32-C3-3chRelay -
Design Drawing
BOM
 Clone
CloneProject Members
Intellectual Property Statement & Reproduction Instructions
This is an open-source hardware project. All intellectual property rights belong to the creator. The project is shared on the platform for learning, communication, and research only; any commercial use is prohibited. If your intellectual property rights are infringed on EasyEDA, please notify us by submitting relevant materials in accordance with the Rules for Complaints and Appeals of IPR Infringement.
Users must independently verify the circuit design and suitability when replicating this project. All risks and consequences are borne by the user, and the platform assumes no liability.
 Empty
Empty
Comment