

 Completed
Portable Spot Welder 2.1
PRO Portable Spot Welder 2.1
License
:Public Domain
Description
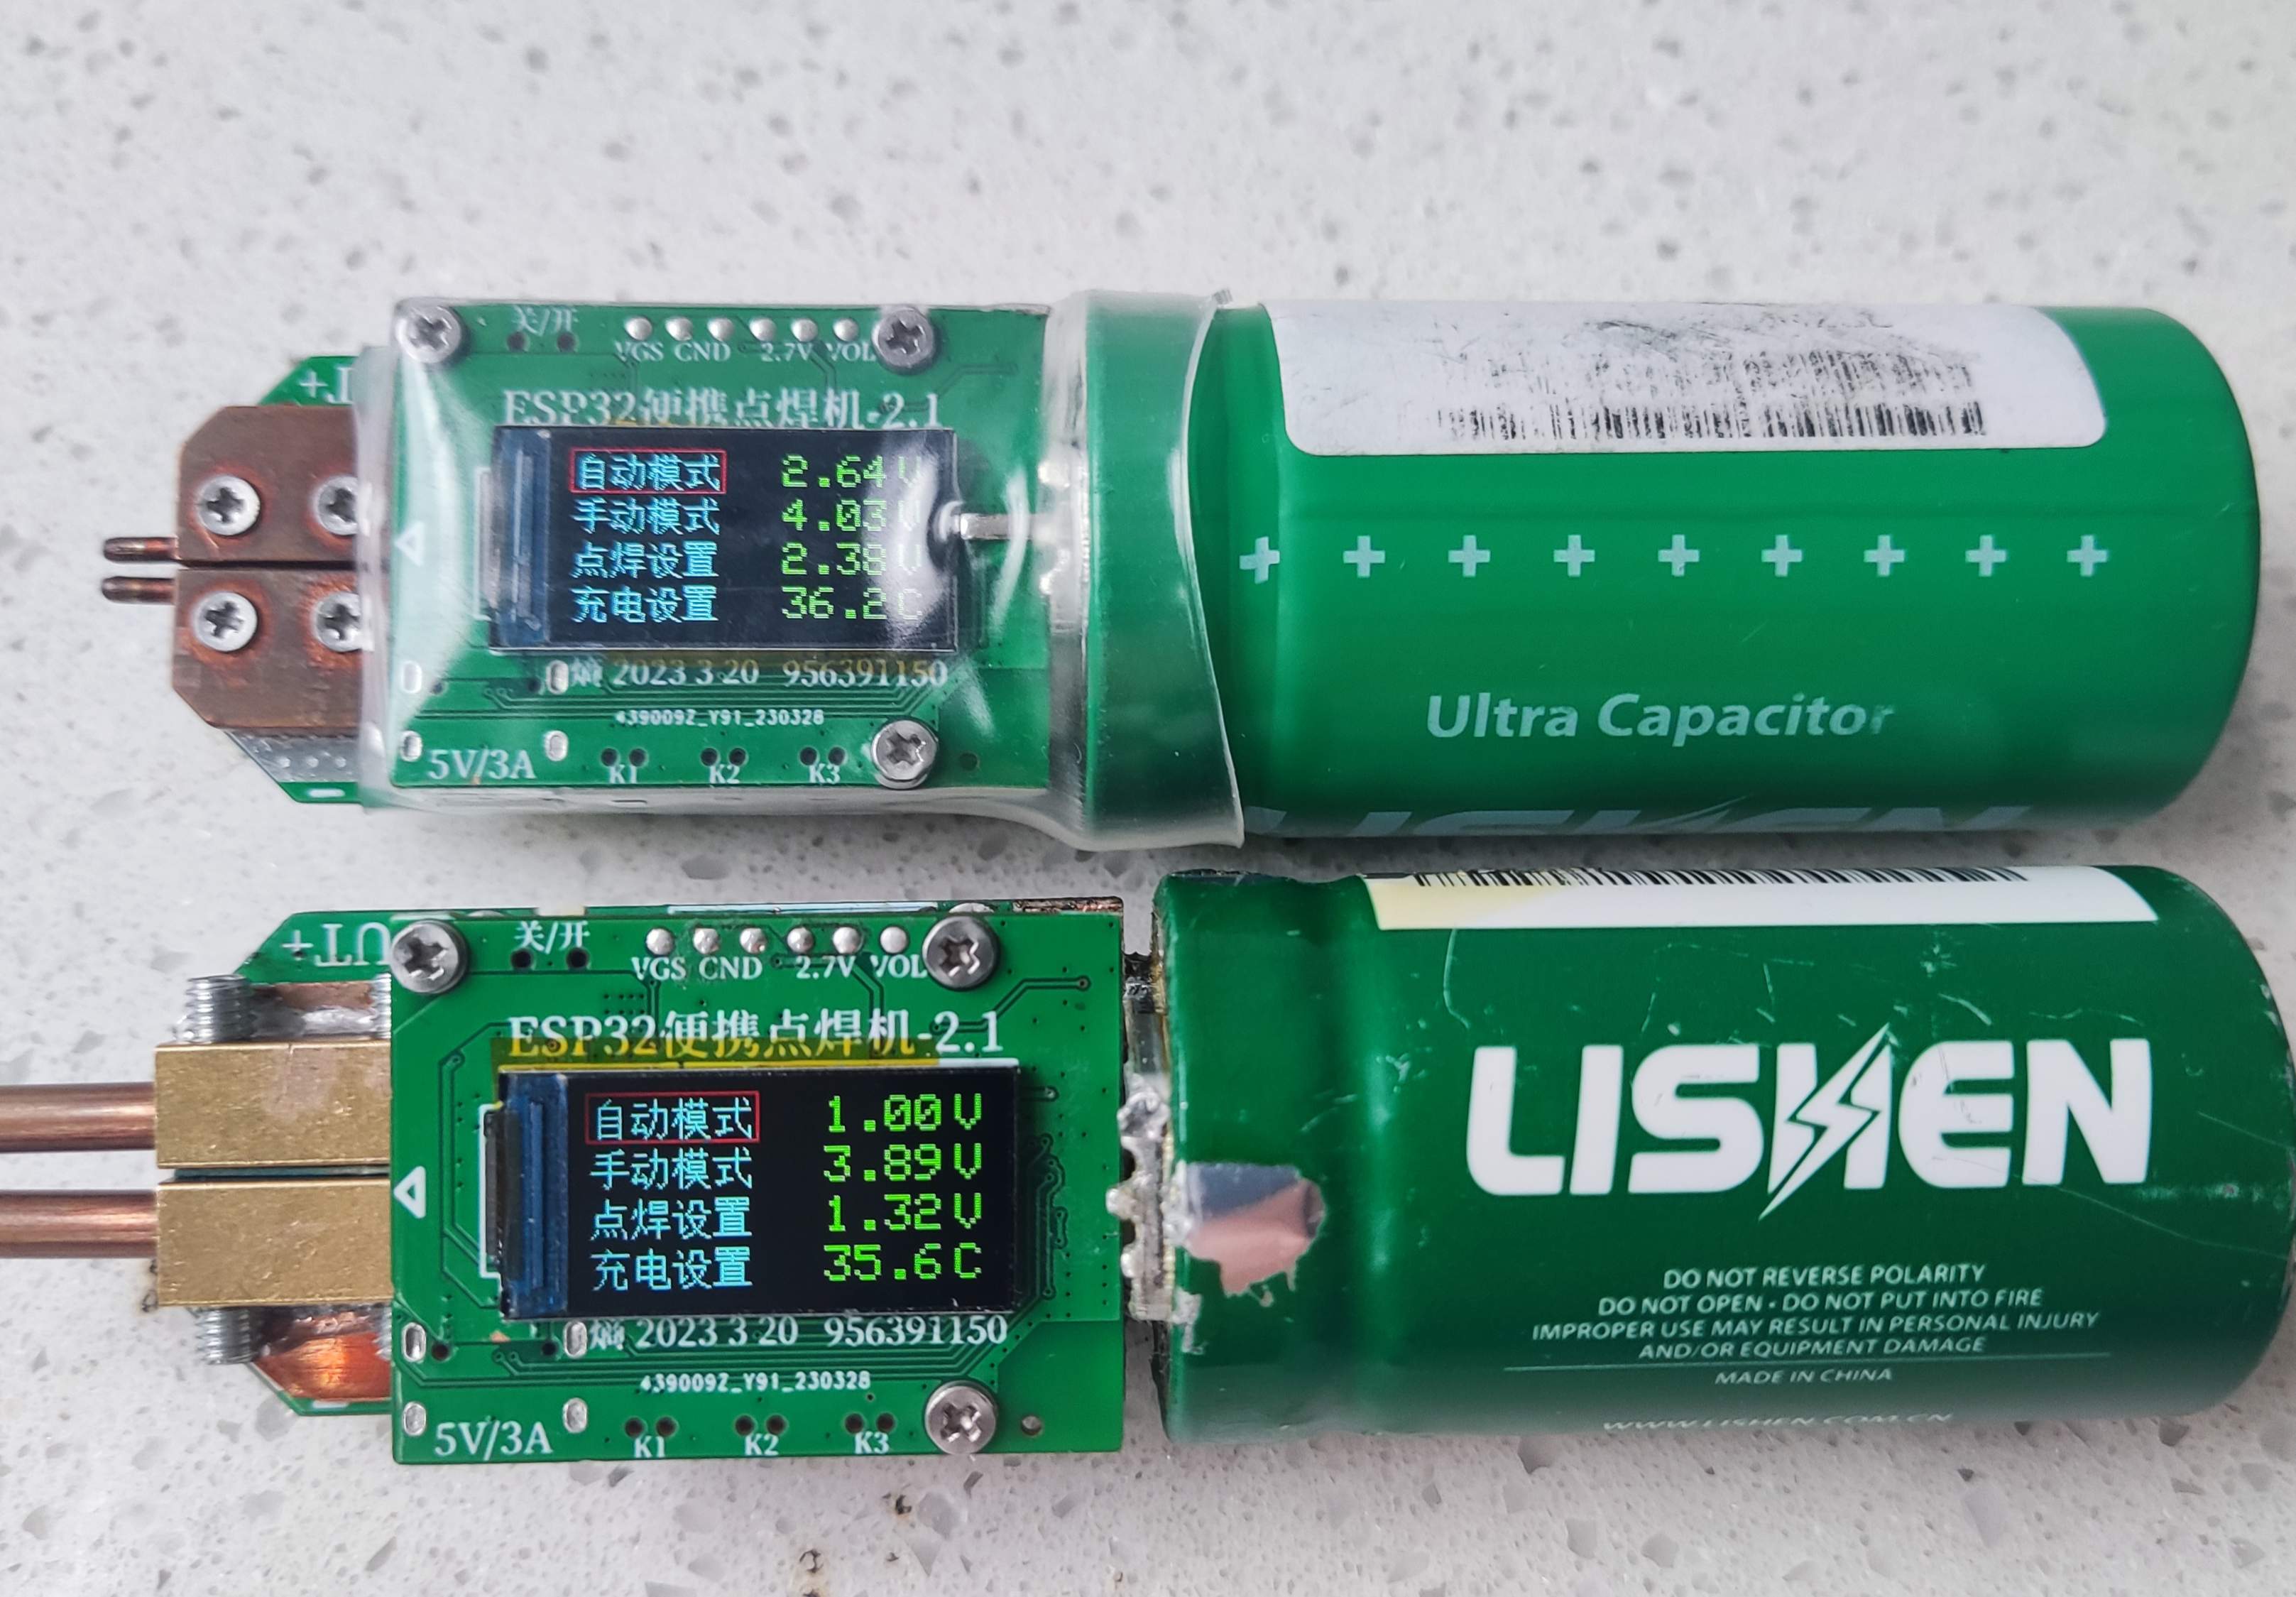
The ESP32 portable spot welding machine is a mini portable supercapacitor spot welding machine that can be controlled with one hand. It uses a single-cell supercapacitor as a high-current power source to provide sufficient instantaneous output power for spot welding. It also has constant power and constant current charging circuits for the supercapacitor. Charging to make up for the shortcomings of slow charging and short battery life of supercapacitors.
Product Introduction
1.The TYPE-C interface is mainly used for ESP32 C3 programming and charging of the device (5V/2A)
2.It has TYPE-C--> supercapacitor input 7.5W (5V/1.5A) constant power charging and lithium battery--> supercapacitor maximum output 0.8A constant current charging circuit and can independently control the switch.
3.Supports the collection and display of parameters such as USB voltage, battery voltage, capacitor voltage, and weldment detection voltage and temperature.
4.0.96-inch ST7735 160*80 display shows various parameters.
5.3 buttons for mode switching, parameter setting function control and a toggle switch to control the power on and off.
6.Equipped with an anti-supercapacitor current backflow circuit to reduce capacitor standby leakage current.
7.Supports automatic spot welding and manual spot welding modes and can set multi-pulse welding time and times
8.It has multiple function switch parameter settings, over-temperature protection and under-voltage protection, etc.
Functional Mode
1.Power-on initial page: K2 key selects the corresponding working mode and parameter setting K1 key selects entry or exit.
2.Automatic spot welding mode: Automatically detects that the weldment is in place and automatically executes the preset spot welding parameter process for spot welding.
3.Manual spot welding mode: K2 key selects different working modes. Mode 0: Press the K3 key to execute a spot welding parameter process. Mode 1: Press the K3 key to turn on the spot welding MOS. If not pressed, it will turn off.
4.Parameter setting mode: K2 key to select the corresponding setting parameter name K3 key to adjust parameters.
5.Charging setting mode: After the switch key is entered, the K3 key sets different charging modes for the capacitor, mainly automatic mode and manual mode. There are different charging path selections in manual mode.
Spot Welding Settings
1.The default spot welding process adopts: spot welding delay + preheat pulse + multiple pulse interval time and multi-pulse combination mode of spot welding pulse, which can also be used in any combination
2.The weldment detection threshold is used to detect the presence of the weldment and the value of the capacitor voltage division.
3.In actual use, when the capacitor voltage is lower than 2V, the solder joint will become unstable. It is recommended to use it above 2V.
4.60mS high level spot welding primary capacitor voltage drops by about 0.05V~0.1V.
5.Only by using appropriate parameters for spot welding materials of different thicknesses can we have better spot welding results.
Charging Settings
1.By default, 2.7V/600F supercapacitor and 3.7V/400mAh lithium battery are used as test samples.
2.When using the automatic charging mode for the first time, it will automatically charge from 0.1V to 2.7V. It will take about 20 minutes (due to over-temperature protection that works intermittently).
3.Automatic charging mode automatically charges from 1V to 2.7V, it takes about 8 minutes.
4.It takes about 8 minutes to charge the TYPE-C--> supercapacitor in manual charging mode from 1V to 2.7V.
5.Lithium battery in manual charging mode - > supercapacitor takes about 20 minutes to charge from 1V to 2.7V.
6.Manual charging mode Non-charging mode for commissioning and transportation.
7.When the USB and battery voltage is too low or the temperature is >50℃, the charging function will not be executed.
Program Download
1.This program is based on the Arduino IDE development source program and dependent libraries. There are compiled and exported burning files in the attachment.
2.Compilation environment: arduino1.8.19/esp32_package_2.0.5.
3.Before compiling, you need to install relevant libraries and select the corresponding development board chip. Set relevant parameters and precautions in the head of the source program.
4.When the chip downloads the program for the first time, the USB connection will not be recognized. You need to pull down the P9 pin first (press the K2 button) and then turn on the power switch to enter the forced download mode.
Hardware Assembly (High Cost Solution)
1.This project uses ESP32 portable spot welding machine by default - 2.1 PCB file includes main control board and power board, ordinary RF-4 material 2-layer board, thickness 1.6mm.
2.ESP32 portable spot welding machine is mainly composed of main control PCBA + power board PCBA + super capacitor + lithium battery + M2 copper pillar screw + conductive copper block clamp + spot welding pin + transparent heat shrink insulation sleeve.
3.The supercapacitor uses 2.7V/600F 4-pin cylindrical package Lishen super farad capacitor by default. See the picture for details.
4.The lithium battery uses a 3.7V/400mAh 602040 packaged soft-pack lithium battery. If there is enough space, the larger the lithium battery capacity, the better.
5.There are a total of 3 pieces of current-conducting copper block fixtures, two pieces of left and right current-conducting solder pin clamps, and one piece of capacitor terminal current-conducting clamp. Designed by SOLIDWORKS 2021, CNC-machined by JLC Copper Materials.
6.Due to the limitation of the conductive copper block clamp, the spot welding pin can only be used with a diameter of 1.8mm. The length of the soldering pin is about 25mm. You can use a 1.8mm copper rod to process and polish it yourself.
7.M2 copper pillar screw parameters: double-pass copper pillar (M2 *3)x5 used as nut + double-pass copper pillar (M2*10)x3 + flat head screw (M2*3)x6 + flat head screw (M2*9)x 5.
8.Transparent heat-shrinkable insulation sleeve with a diameter of 35mm and any length. The above assembly device parameters are used to improve the spot welding effect and user experience regardless of cost.
Hardware Assembly (Low Cost Solution)
1.The 2.7V/500F flat-leg capacitor is easy to assemble, but the spot welding effect is not very good. The 2.7V/600F Lishen 4-pin capacitor is extremely difficult to weld without using a conductive copper clamp. Just use one of these.
2.The flat-leg capacitor power board is not compatible with the diversion copper block fixture . You need to cut the copper plate diversion and brass material by yourself: square one-in and one-out terminal block (16*5.3mm) as a low-cost alternative. See the picture for details.
3.Lishen's 4-pin capacitor power board does not use diversion copper block clamps to reduce costs, but it is necessary to cut the copper plate diversion and brass materials by yourself: square one-in and one-out terminal blocks (16*5.3mm) as a low-cost alternative.
4.If you use a terminal block as a soldering pin fixture, you can use a 4mm diameter copper rod to process and polish the soldering pin yourself, or you can buy a professional soldering pin.
5.The parameters of M2 copper pillar screws are slightly different. You need to confirm by yourself. The parameters of other devices are basically the same.
6.The low-cost solution is a personal choice at the expense of spot welding effect, assembly difficulty and user experience.
Announcements
1.This project is created as an open source for personal hobby only and is not a commercial product. There is no guarantee that it complies with any regulations and safety requirements. Any risks and consequences arising from the use of the products of this project are borne by the user.
2.The use of this product must comply with relevant laws and regulations and shall not be used for illegal activities. By using this product, you indicate that you have read and agreed to this disclaimer.
3.Since the voltage of a single supercapacitor is only 2.7V, it cannot output a larger current when the overall internal resistance is constant, resulting in weak solder joints when spot welding nickel strips larger than 0.2mm. Spot welding 0.1mm nickel strips is no problem at all.
4.Component parameters are subject to the schematic diagram. The relevant software and hardware information on Taobao for components that Jialichuang does not have are in the attachment. This project uses a large number of 0402 package components and has a complex structure. It is not recommended for novices to copy.
5.This project is CC BY-SA 4.0 open source project. If you need mass production for commercial use, you must find the original author for authorization for personal use and <100 sets for commercial sale.
Communication Platform
1.This project is created as an open source for personal hobby only. All developers and enthusiasts are welcome to participate and jointly improve and promote the development of the project.
2.LC Open Source: https://oshwhub.com/fj956391150/pian-xie-dian-han-ji.
3.Gitee open source: https://gitee.com/arduino2021/esp32-portable-spot-welder-2.1.git
4.QQ communication group: 619331673
Physical Display


Designed by 负熵生之光 (from OSHWHub)
Design Drawing
 Empty
Empty
Comment