

 Completed
PixelTime Electronic Watch
PRO PixelTime Electronic Watch
License
:CC BY-NC-SA 4.0
Description
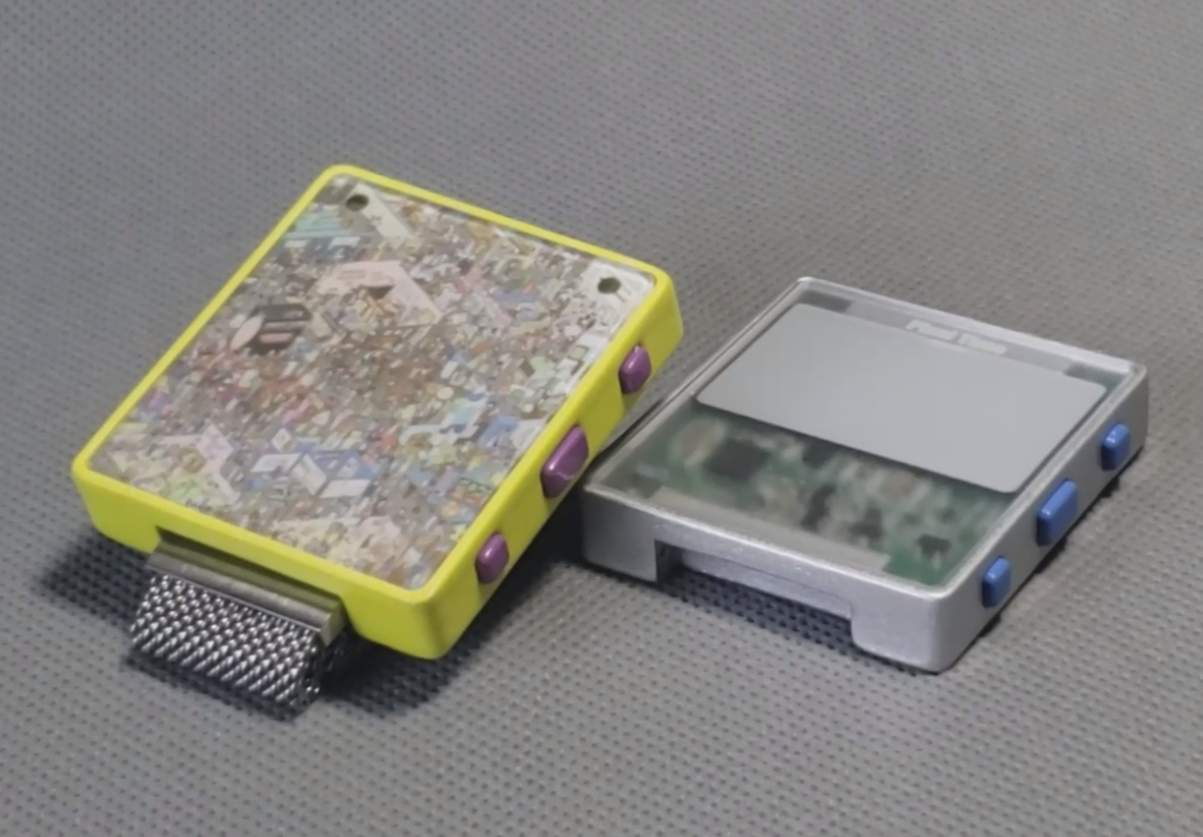
PixelTime
https://www.bilibili.com/video/BV1Bj411i7ZR
I really like some early electronic watches.
No need for complicated functions, just a pure timing tool.
Ultra-long standby , automatically enters standby mode if no operation is performed for 5 seconds.
Use WiFi to automatically adjust the time and update the time conveniently.
Support MicroPython programming to facilitate code updates.
Thickness is only 8.3 mm, using 302530 lithium battery 200mAh.
4P magnetic charging, 20 mm strap.
It would be good to get a 3D printed transparent exploration version , with a transparent panel.
Note
Due to the use of a large number of colorful LEDs, a large amount of heat will be generated, so long-term operation is not recommended.


Updating
I used the spray painting service of 3D Monkey and the effect was great. I strongly recommend bright colors and varnish on the surface. It feels good to the touch. Let’s take a look at some pictures of the assembly.


The board is now working normally, please use PCB version 1.3a.


License
Content related to hardware design and structure is attributed-Noncommercial-ShareAlike 4.0 International (CC BY-NC-SA 4.0)
Hardware
The low-power consumption strategy of this project is mainly to supply power to circuits that are needed and directly cut off power to circuits that are not needed to avoid unnecessary power consumption and thereby increase the standby time.
In standby mode, only the rtc chip is powered, and all other chips are powered off.
The area that is always powered is the RTC chip RX8111CE, which is directly powered by the lithium battery to ensure the normal operation of the calendar time as shown in the figure below.

The power supply of the MCU is only provided when it is in use. It mainly relies on the power interruption of vdd_spi inside the esp32c3 to control the overall 3.3v supply. When not in use, the MCU and LDO are directly powered off.

In the battery measurement part, in order to greatly reduce power consumption, the following control circuit is used to disconnect it in time to prevent current consumption caused by resistance. Refer to the link.

The LED matrix uses 15x8 colorful lamp beads, which has good color control. A variety of effects can be achieved with one IO.

Download
Press and hold the down button before powering on to enter esp32 download mode, and a serial port will appear on the computer.
Download the mpy firmware, see the attachment for details, and install it according to the web page method MicroPython - Python for microcontrollers.
Then follow the command line in the website, or you can go to Espressif Systems to download the flash download tool for firmware burning.
Then copy the program file to the board. You can use Thonny or Mu software.
You need to fill in your own wifi information in the config.py file.
The up button is used to connect to wifi and update the time.
The middle button can switch the display content.
Press key to shut down.
Assemble
How to assemble.
In addition to the components in the BOM list, other parts need to be prepared:
- 2x magnets , 4mm diameter, 1.5mm thickness
- 1x 4P magnetic data cable
- 4x Pogopin
- 1x panel
- 1x watch strap 20mm
- 1x 3D printed structural parts

PCB
Board thickness is 0.8mm.
Optional stickers for multiple sensors.
RX8111 is a must-attend item.
Panel
For the panel printing part, a frame has been provided. It is recommended to use frosted acrylic, 1mm, with adhesive backing. Change it to your favorite picture for printing.
3D Printing
It is recommended to use black printing for the pressure plate .stl file in the 3D printing .zip in the attachment. The other files can be printed according to your own preferences.
Among them, 3D Monkey LEDO 6060 resin supports spray painting service, and it is recommended to use glossy surface.

Please refer to the official website for details of the picture below.


Designed by M0dular (from OSHWHub)
Design Drawing
 Empty
Empty
Comment