

 Completed
ESP32 Tube Lamp Panda
PRO ESP32 Tube Lamp Panda
License
:GPL 3.0
Description
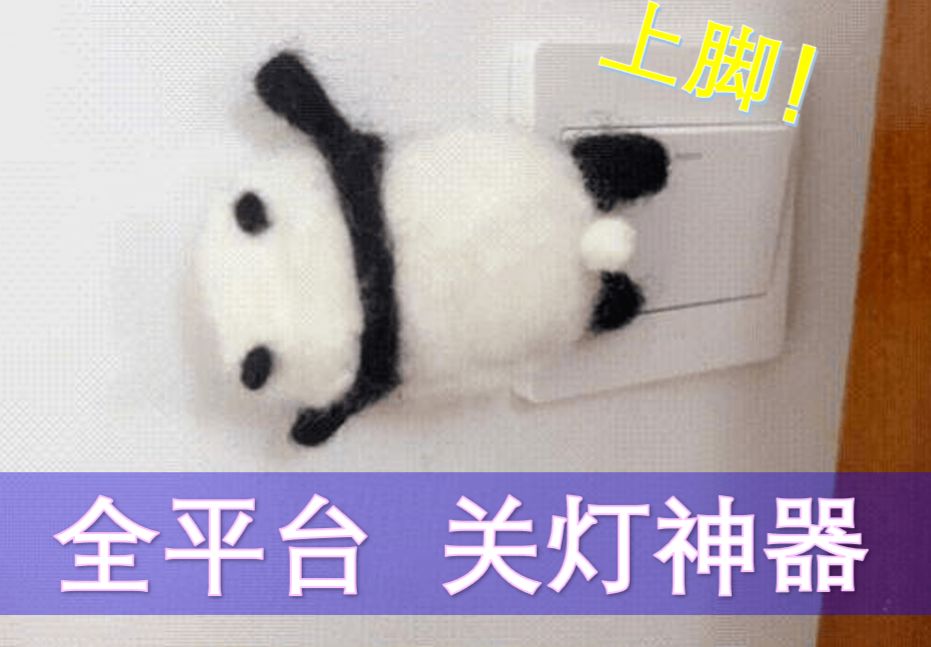
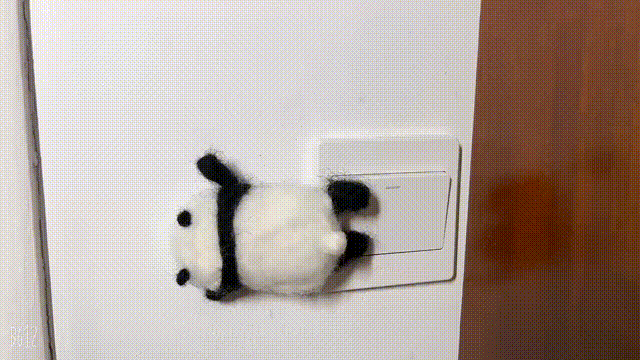
ESP32-C3 Tube Light Panda
ESP32-C3 tube light panda design focuses on the service of lazy people, so that lazy people no longer need to turn over and get out of bed to find a switch, just pull down the notification bar and press it lightly, you can enjoy an elegant and convenient lighting control experience, the switch is a small thing, let the panda do it with his feet, lazy people should lie flat and more comfortable. The project basically solved the major problem of turning off the lights before going to bed in winter.
Production and use introduction video: [Open Source] [DIY] ESP32 Tube Light Panda Direct connection to Iphone 15 minutes reproduction! All platforms controllable lazy artifact! _Bilibili_bilibili
Project Advantages:
- It is directly connected to Homekit to achieve LAN control, supports Siri control and direct control of the notification bar, responds quickly, and can be connected to the ESP Rainmaker cloud platform to achieve remote control.
- Easy to configure: You only need to scan the code twice to complete the configuration, and you can use it happily.
- Low power configuration, both fast response and battery life, with 2000mAh battery, only use ESP Rainmaker control standby battery life of about 90 days, HomeKit+ESP Rainmaker standby battery life of about 45 days.
- Super easy to reproduce:
-
- The code and hardware and structure are completely open source.
- The firmware supports one-click programming, no burning tools required, and no need to download any development environment.
- All materials are selected in easy-to-solder packages, and components that can be pasted in the Lichuang basic library are selected as much as possible.
- Links to purchase major components are available.
5.Support battery low battery alarm and automatic shutdown, stable function.
6.The appearance design is elegant, and the material cost of the whole machine is about 30 yuan.
Zero-code forking
Prerequisites: Make an ESP32-C3 switch panda. You can also use other ESP32-C3 development boards, but you need to connect the servo yourself, otherwise you can only use LOG to observe the control effect.
- Burn
- Click on the image below to jump to the burning page:

- Connect the switch panda to the computer.
- Press and hold the reset button and the BOOT button (IO9) on the switch panda at the same time, then release the BOOT button first, and then release the reset button to force the chip to enter the programming mode.
- Click connect and select the serial port corresponding to the switch panda to connect. The serial port name is usually similar to USB JTAG/serial debug unit (COMXX) - paired
- Click Flash to start burning.

- Distribution network:
-
- After the burning is completed, click the reset button on the switch panda.
- Click connect on the web page and select the corresponding serial port to connect the device.
- Click Console on the web page to enter the console page and click Reset Device.
- After a moment, two QR codes will be displayed on the console, one larger and one smaller. First, use the Rainmaker APP to scan the large QR code to configure the device. After completion, you can control the device on the APP. At the same time, the console will generate a new small QR code.
- Use Apple's own Home APP to scan the small QR code to bind the device.
- Finish!
Instructions for use:
- Adjust the installation angle of the servo: You can adjust the position of the servo that is turned on and off in the Rainmaker APP.
- Reset the network configuration information: Press and hold the Boot button for more than 5 seconds to reset the network configuration information.
- Low voltage protection: There is voltage sampling on board. When the voltage is too low, the device will automatically shut down and the device can be charged directly through the USB port.
Code open source link: lisir233/esp_smart_light_controller (github.com)
Designed by 乐鑫小铁匠 (from OSHWHub)
Link:https://oshwhub.com/esp-college/esp-light-controller-pubilc
Design Drawing
 Empty
Empty
Comment