

 Completed
[Development board] Smart NES game console
PRO [Development board] Smart NES game console
License
:Public Domain
Description
1. Function introduction:
(1) NES games , such as Super Mario, Contra, Teenage Mutant Ninja Turtles, Tank Battle, etc.
(2) Bluetooth remote control (handle or mobile phone), which can be inserted into the Bluetooth module.
(3) Wired controllers (such as PH2.0 JoyStick controllers) have reserved I2C interfaces.
(4) Vibration feedback.
(5) Audio playback , you can use speakers or wired headphones to play audio.
(6) Lithium battery powered , Type-C charging, easy to carry.
(7) Press the button to turn on and off the machine, press it briefly to turn it on, and press it long to turn it off.
(8) SD card reading , playing massive NES games.
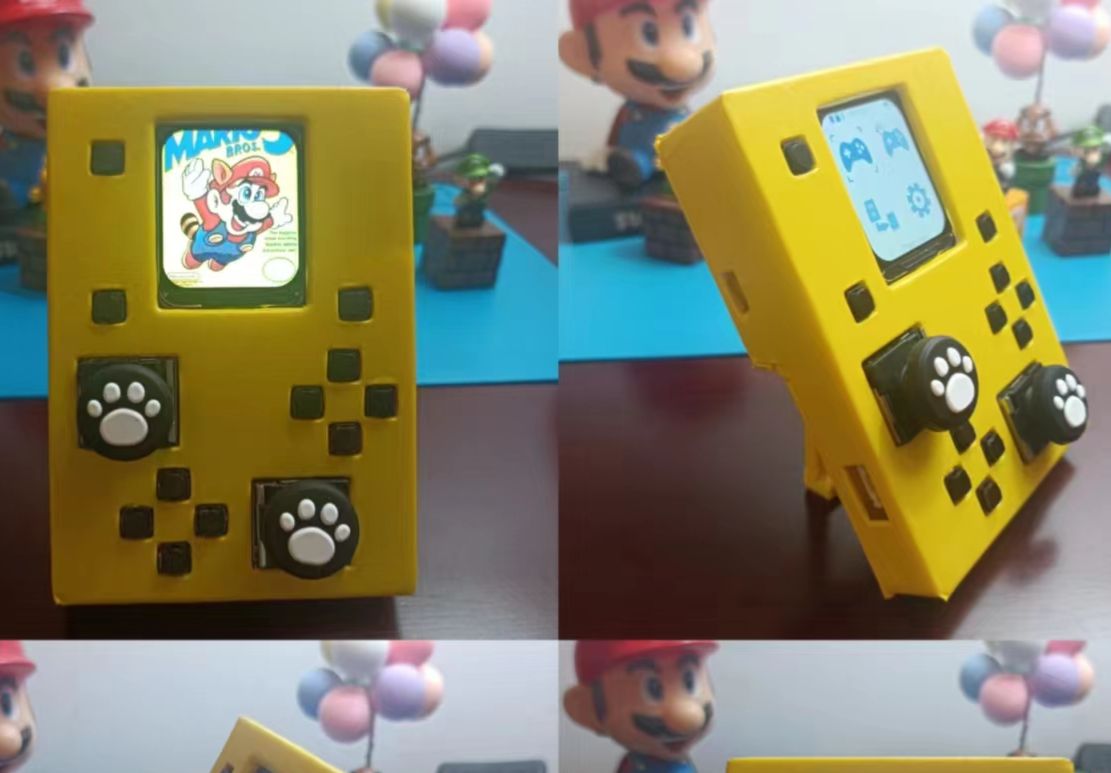
Appearance: Pays tribute to the dual-stick layout of the Xbox controller, and the 3D printed shell is beautiful and protects the body.
2. Schematic description
(1) Compared with JLC's official game console expansion board, the pin assignment has been greatly changed.

(2) Double rocker, multi-button design.

(3) Add Bluetooth module interface and handle module interface.


(4) The 5V charging and discharging integrated module refers to the official product of JLC and is integrated into the game console expansion board.

3. PCB design instructions
(1) Similar to the layout of a mobile phone, the Type-C interface and headphone interface are placed at the bottom.

(2) The handle module I2C interface and Bluetooth module interface are located on the side.


(3) When wiring, make sure the power cord is as wide as possible.

4. Description of key procedures
See attachment for code.
(1) The SPI driver of the screen is changed from SPI4 to SPI3. You need to modify the corresponding parameters in the LCD.c file, SPI.c file, and nes_ppu.c file.


(2) Change the boot logo and hide the initialization character prompt.

(3) After entering the NES game, the background color of the upper and lower columns is changed to black, and the display content stops refreshing, and it resumes after exiting the game.

(4) The codes for the external controller and Bluetooth module are still being verified.
5. Physical display
Appearance:

Connect the handle and Bluetooth module:

Please see the attachment or Bibili for the demonstration video: [LC Development Board] Smart NES game console - Bilibili https://b23.tv/tMDYpfa
Designed by Fishbili (from OSHWHub)
Design Drawing
Intellectual Property Statement & Reproduction Instructions
This is an open-source hardware project. All intellectual property rights belong to the creator. The project is shared on the platform for learning, communication, and research only; any commercial use is prohibited. If your intellectual property rights are infringed on EasyEDA, please notify us by submitting relevant materials in accordance with the Rules for Complaints and Appeals of IPR Infringement.
Users must independently verify the circuit design and suitability when replicating this project. All risks and consequences are borne by the user, and the platform assumes no liability.
 Empty
Empty
Comment