

 Completed
Portable USB Hi-Fi ear amplifier
PRO Portable USB Hi-Fi ear amplifier
License
:CERN Open Hardware License
Description
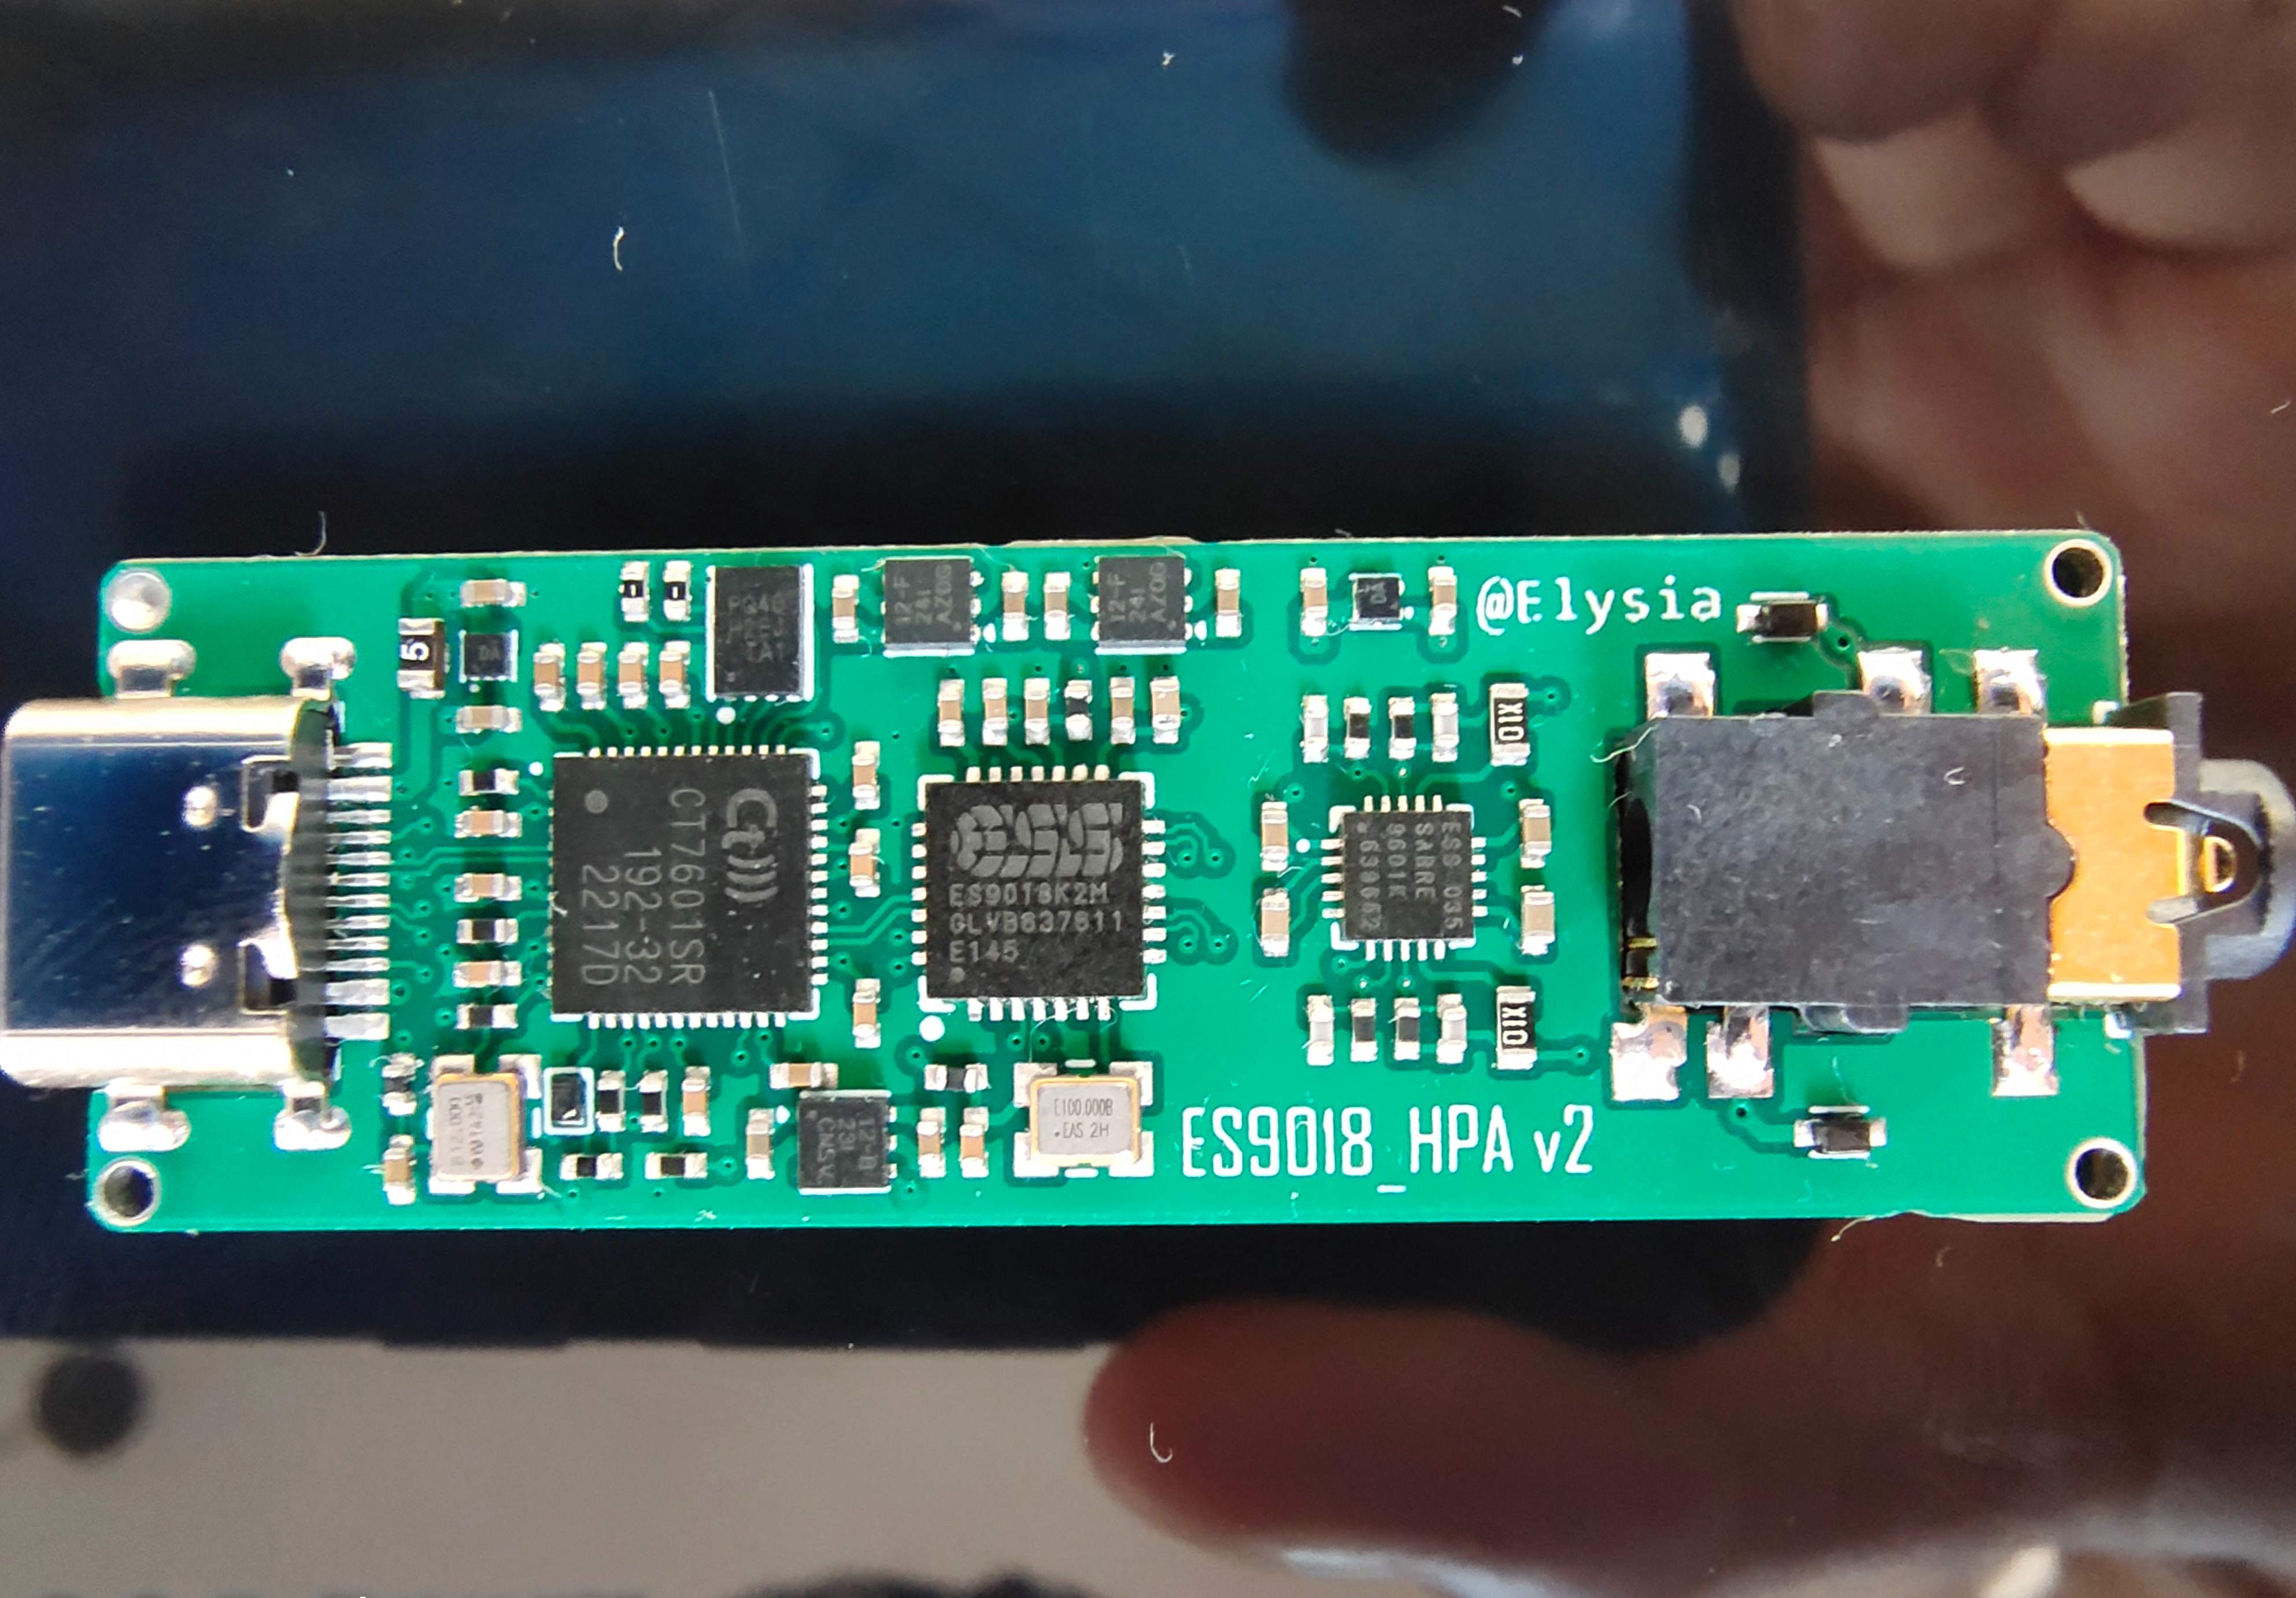
This is a USB portable headphone amplifier design based on CT7601SR+ES9018K2M , supporting PCM 32bit/192kHz and DSD audio playback.
Version update record:
V1.0: initial verification version;
1) Reduce the size of the board;
2) Replace the amp IC from MAX97220 to SABRE9601K, which will be better when used with ES9018;
3) Added dual-color LED as audio format display;
4) Fixed the bug that the left and right channels of the headphone socket are opposite.
The detailed parameters of the design are as follows:
- Select CT7601SR as the USB interface chip, which is low-priced (about 20RMB/1pcs), driver-free, supports up to 32bit bit depth, and has a sampling rate up to 192kHz, meeting the needs of modern digital audio;
- The DAC uses ES9018K2M, 127dB SNR, and supports up to 32bit/384kHz PCM audio and DSD 128 direct bit stream audio (limited by the USB interface chip, it supports up to 32bit 192kHz PCM and DSD64);
- The headphone amplifier chip uses SABER9601K, which has a higher signal-to-noise ratio and higher fidelity than the MAX97220 used in the V1 version. It is powered by a single power supply and is suitable for portable applications;
- 4-layer board design, using optimized components and circuit layout, allowing the audio performance to be fully utilized;
- The shell size is 52mm*20mm*8mm, which is small and easy to carry;
- Provides shell model files for 3D printing, which are beautiful and can better protect the PCBA from damage.
Actual picture:
Front

Reverse side

Connect the headphone amp to the computer. At this time, the LED on the back of the board will light up. When idle and playing back PCM audio, the LED will be blue . When playing back DSD audio, the LED will be green.


Things to note:
Since CT7601 needs to burn firmware before it can be used normally, the following content will introduce how to burn firmware through DFU (see the attachment for firmware tools)
1. First install the following two drivers (abbreviated as 0ea0 and 2fc6)
Comtrue-inc_Firmware_Update_Device_0ea0
Comtrue-inc_Firmware_Update_Device_2fc6
2. Open "ISP-Tool" and connect the board to the computer USB port.

When the frame on the right appears green, as shown below, it means that the current board has been recognized and you can start programming.

3. Click the "File" button to select the firmware to be flashed (CT7601_ES9018K2M.hex)
Then click the "Auto" button to start burning. When "Success" appears in the "Status" below, it means the burning is successful.
4. After the burning is completed, the computer will automatically recognize the USB DAC and can use it (win10/11 only)
Designed by 滤波の電容 (from OSHWHub)
Design Drawing
Intellectual Property Statement & Reproduction Instructions
This is an open-source hardware project. All intellectual property rights belong to the creator. The project is shared on the platform for learning, communication, and research only; any commercial use is prohibited. If your intellectual property rights are infringed on EasyEDA, please notify us by submitting relevant materials in accordance with the Rules for Complaints and Appeals of IPR Infringement.
Users must independently verify the circuit design and suitability when replicating this project. All risks and consequences are borne by the user, and the platform assumes no liability.
 Empty
Empty
Comment